


Jetzt, da alle #vehiclequilt Block Anleitungen veröffentlicht sind, möchte ich anfangen alle Tipps und Tricks für das Nähen der vehiclequilt Blöcke in einem Beitrag zu sammeln und diese genau zu erklären. Ich zeige Euch in Näh-Foto-Turorials, wie vermeintlich schwierigere Schritte doch sehr einfach zu nähen sind.
Ich habe folgend schon einige Tipps zusammengesucht, freue mich aber, wenn Du noch in einem Kommentar schreibst, welchen Schritt Du genauer erklärt haben möchtest. Nachdem ich nämlich inzwischen alle vehiclequilt Blöcke mehrfach in beiden Größen genäht habe, kann ich diese auch im Schlaf nähen…
Dieser Beitrag soll also im Laufe der Zeit immer umfangreicher werden und dann für jeden, der Lust hat einen vehiclequilt zu nähen, alle Tipps und Tricks bereithalten.
Since the #vehiclequilt block patterns are released, I want to start collecting all the tips and tricks for sewing vehiclequilt blocks in one post and explain them in detail. I’ll show you how supposedly more difficult steps are actually very easy to sew in a sewing-photo-tutorial.
I have already collected some tips, but would be happy if you write in a comment, which step you want to have explained in more detail. Since I have already sewn all vehiclequilt blocks several times in both sizes, I can sew them in my sleep…
So this post should become more and more extensive over time and then hold all the tips and tricks for everyone who wants to sew the vehiclequilt.

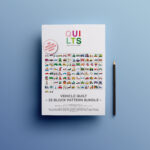
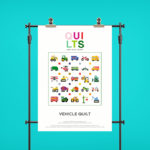
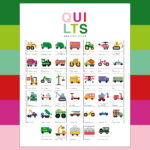
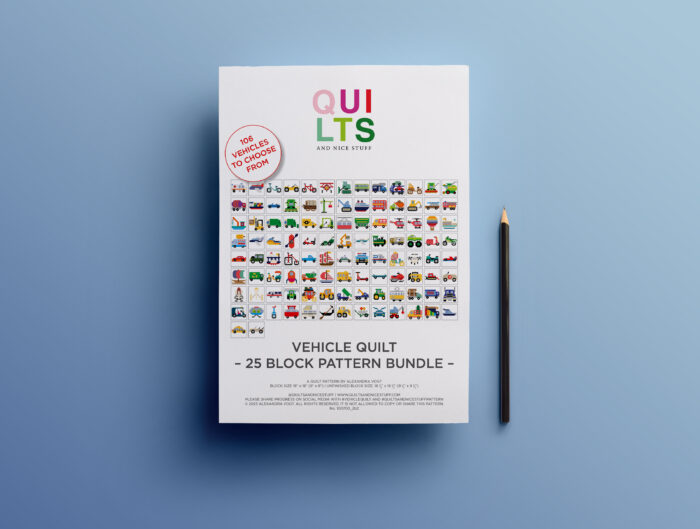
Vehiclequilt Block Pattern Bundles
Zum Thema „Vehiclequilt Pattern Bundles“ habe ich in meinem letzten Beitrag ausführlich geschrieben. Hier zeige ich Euch welche Bundles es gibt. Aber natürlich kann man die vehiclequilt Blöcke auch einzeln kaufen. Hier geht es zum Beitrag „Vehiclequilt Pattern Bundles“. Folgend findest Du aber auch den Link zum meinem Etsy Shop oder zur Übersicht aller Vehiclequilt Blöcke.
In my last post I wrote about „vehiclequilt pattern bundles“. There I show you which bundles are available. But of course you can also buy the vehiclequilt blocks individually. „Vehiclequilt Pattern Bundles“. Below you will also find the link to my Etsy store or to the overview of all Vehiclequilt blocks.
Photo Tutorial of some vehiclequilt steps
Dann geht es los mit der Sammlung an Tipps und Tricks für den Vehiclequilt. Für die #vehiclequilt Block Anleitungen gibt es 2 verschiedene Blockgrößen. Beim Nähen unterscheiden sich diese nicht, aber an der ein oder anderen Stelle sehen die Teilstücke der beiden Blockgrößen anders aus. Das vermerke ich bei dem jeweiligen Näh-Foto-Tutorial.
Following you’ll find the collection of tips and tricks for the vehiclequilt. For the #vehiclequilt block pattern there are 2 different block sizes. When sewing these do not differ, but in one or the other place the pieces look slightly different. I note that with the respective sewing-photo-tutorial.

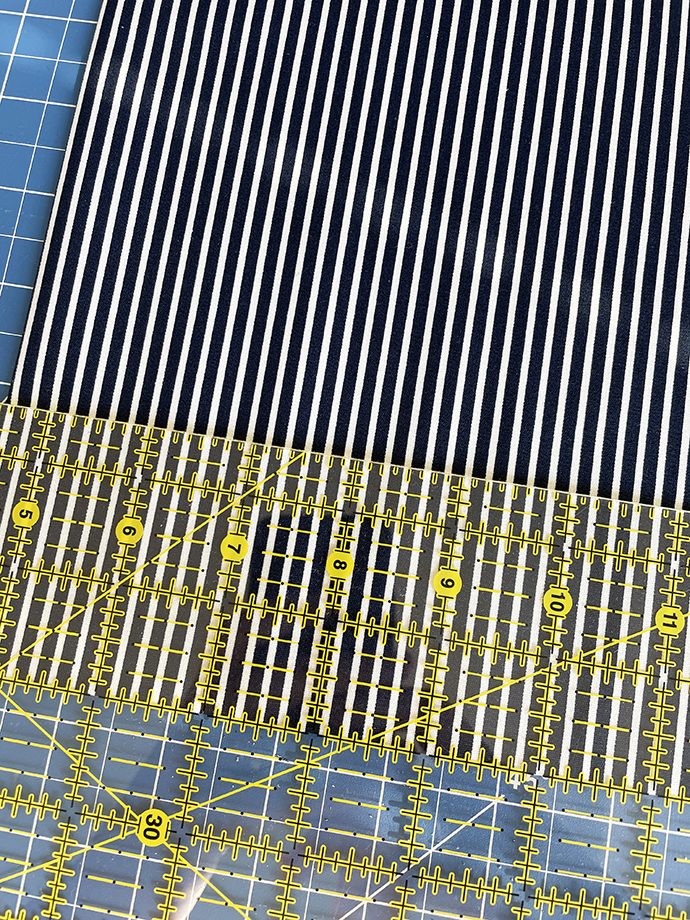
Nähtipp Nummer 1 : Überprüf Deine 1/4 inch Nahtzugabe /
Sewing Tipp No. 1 – Check your 1/4 seam
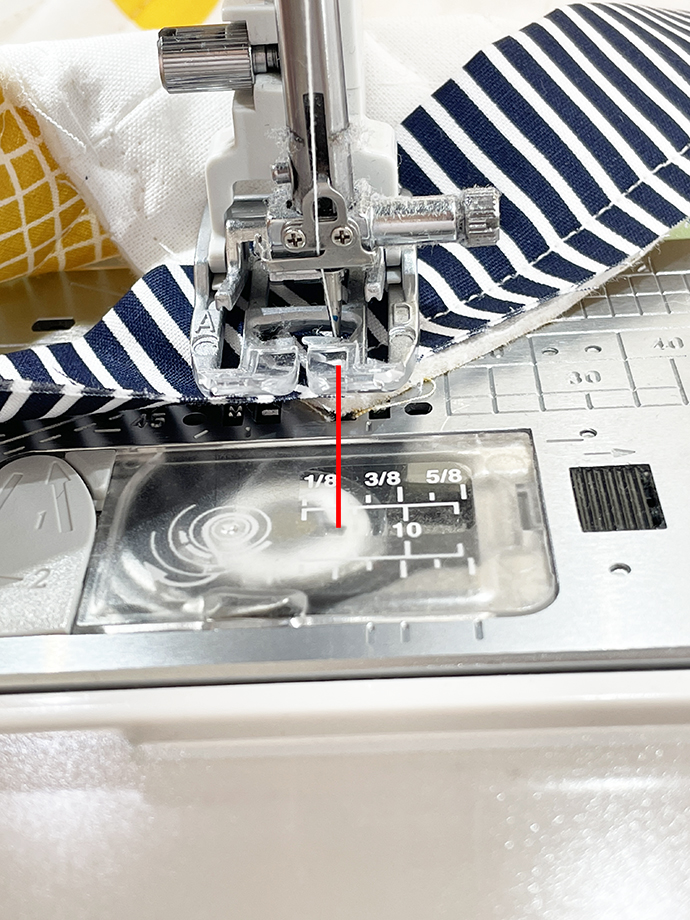
Für alle vehiclequilt Blöcke gibt es einen Tipp, den ich Dir zuallererst gerne geben möchte. Überprüf Deine 1/4-Nahtzugabe. Das ist ganz einfach!
For all #vehiclequilt blocks, there is one tip that I would like to give you first and foremost. Check your 1/4 seam. That is done very easily.
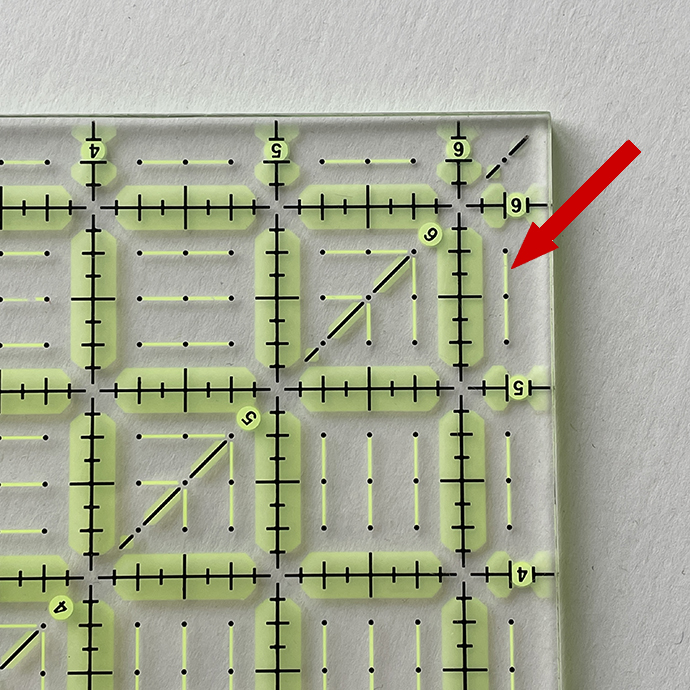
Take your quilt ruler and find your 1/4 inch line.
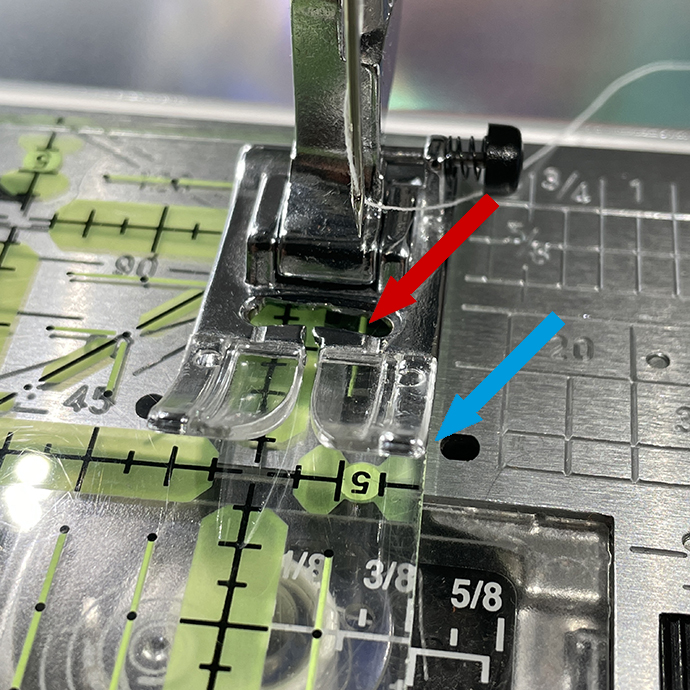
Die Nadel ist oben (roter Pfeil).
Place your ruler under your sewing foot aligned with the foot (blue arrow).
Your needle is up (red arrow).

Die Nadel sollte die 1/4 inch Linie des Lineals berühren. Wenn nicht, justiere diese an Deiner Nähaschine nach.
Slowly turn down the needle with your !!! handwheel !!!
The needle should touch the 1/4 inch line of your ruler. If not, readjust them on your sewing machine.
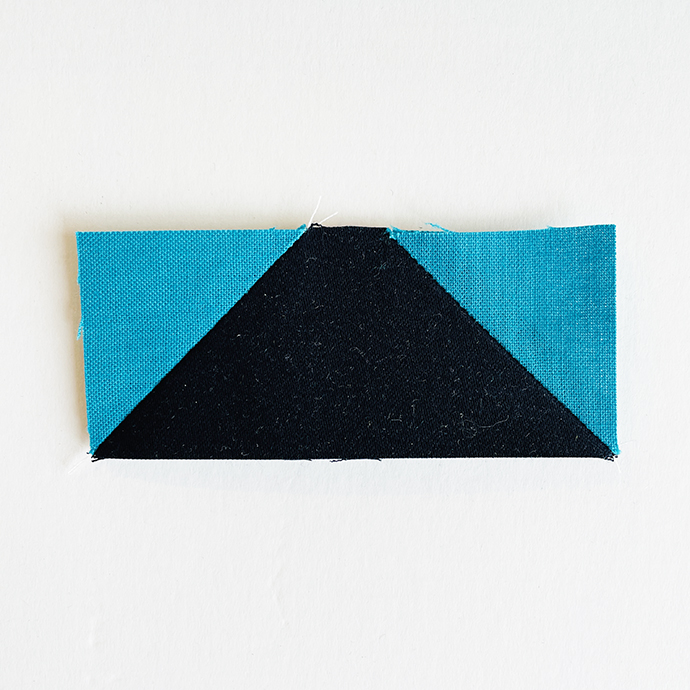
Easy Corner Triangle Tutorial
Um ein Dreieck an ein Rechteck zu nähen, verwende die „Easy Corner Triangle Methode„. Die Schritte sind ganz einfach, sobald Du herausgefunden hast, wie man es macht. Das Näh-Foto-Tutorial zeigt einen 18 inch Block:
For sewing your triangle onto a rectangle, use the „easy corner triangle method“. The steps are quite easy as soon as you’ve figured out how to do it. The sewing-photo-tutorial shows an 18 inch block:
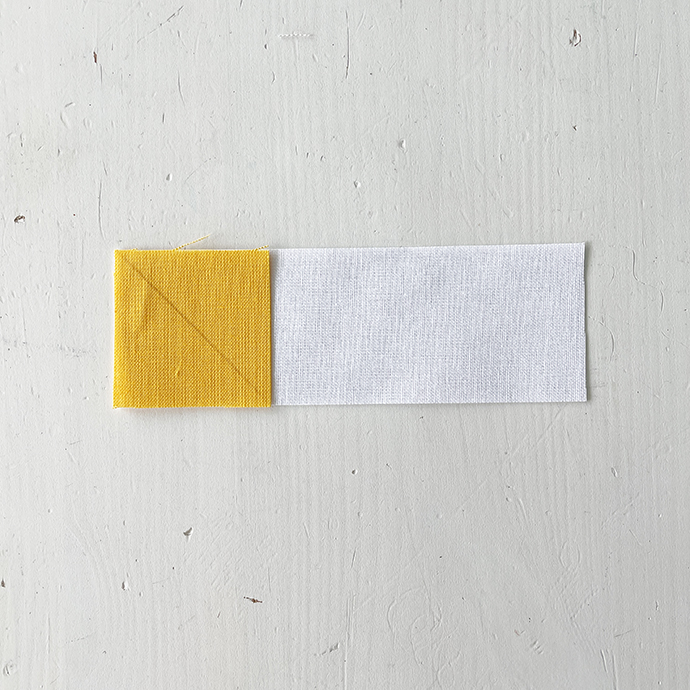
Take the yellow square and draw a diagonal line on the wrong side of your fabric. Place it right sides together onto the white rectangle.

Sew on the drawn line.
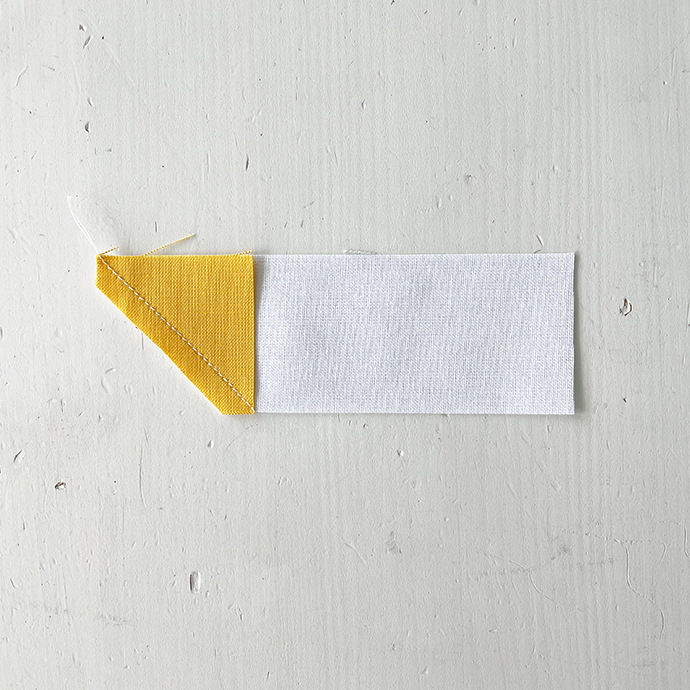
Cut 1/4 inch next to your sewn line.
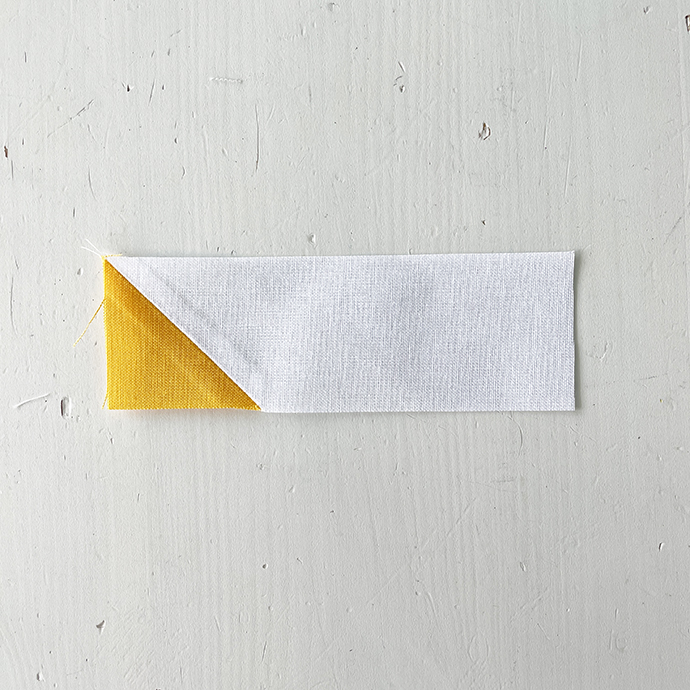
Press seam open.
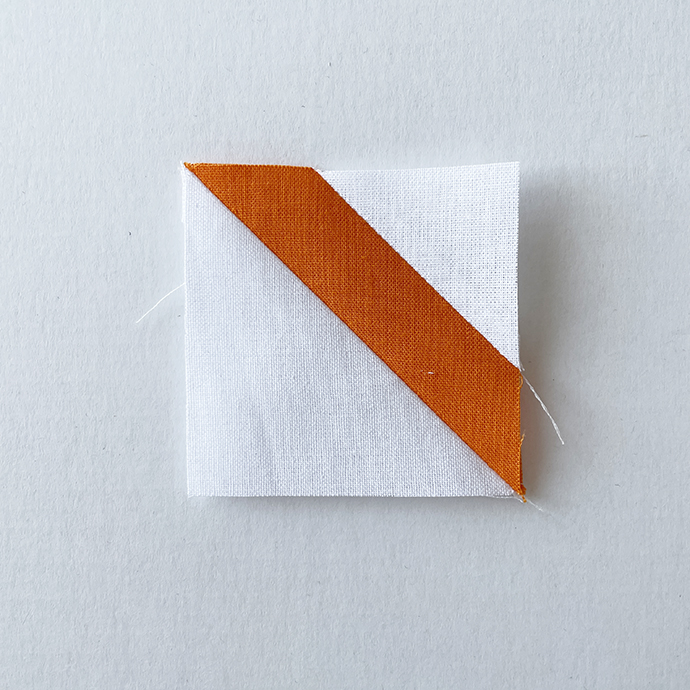
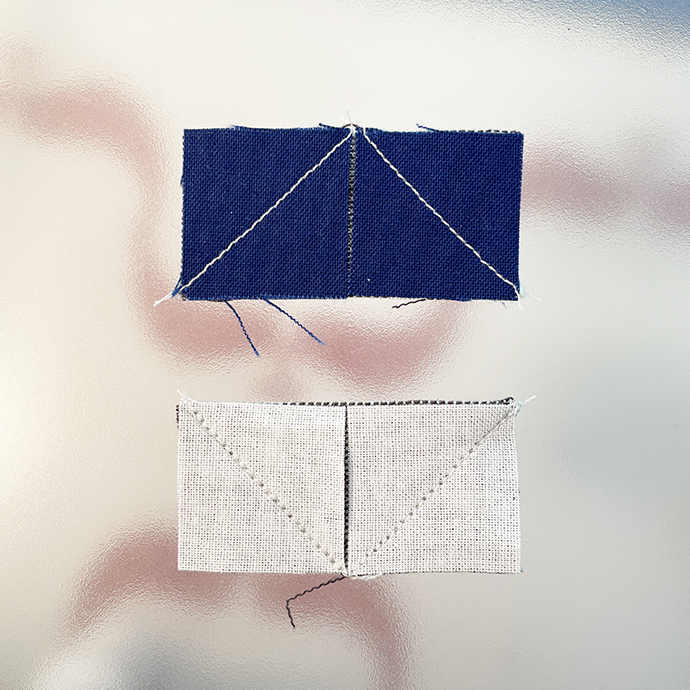
HST – Half Square Triangle Tutorial
HST steht für „Half Square Triangle“.
Ein Half Square Triangle ist eine quadratische Quiltblockeinheit, die aus zwei Dreiecken besteht. Die Dreiecke werden an ihrer diagonalen Seite zusammengenäht. Jedes Dreieck bildet eine Hälfte des Quadrats.
Das Näh-Foto-Tutorial zeigt einen 18 inch Block:
HST stands for „Half Square Triangle“.
A half square triangle is a square quilt block unit made from two triangles. The triangles are sewn together on their diagonal side. Each triangle forms one half of the square.
The sewing-photo-tutorial shows an 18 inch block:

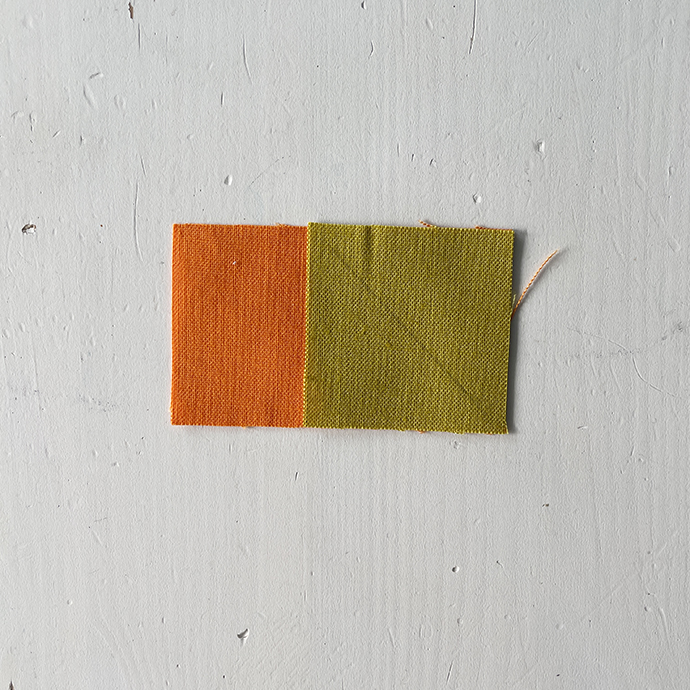
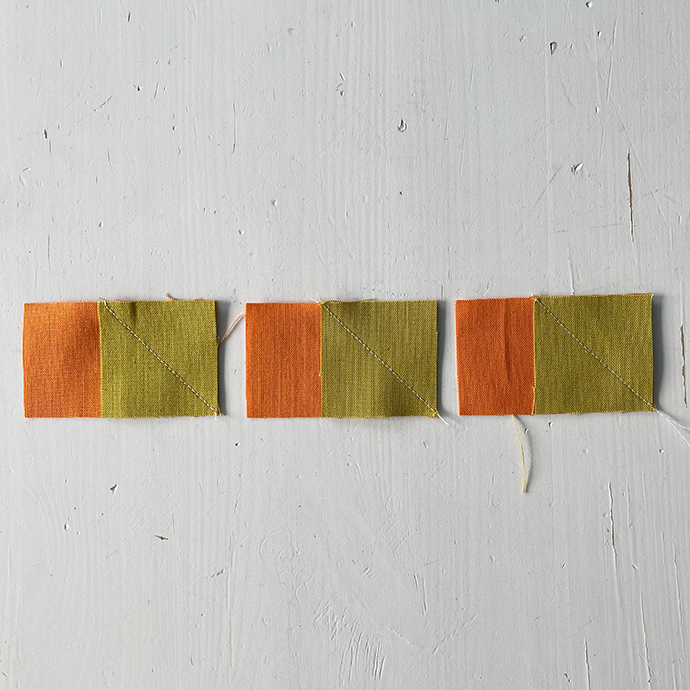
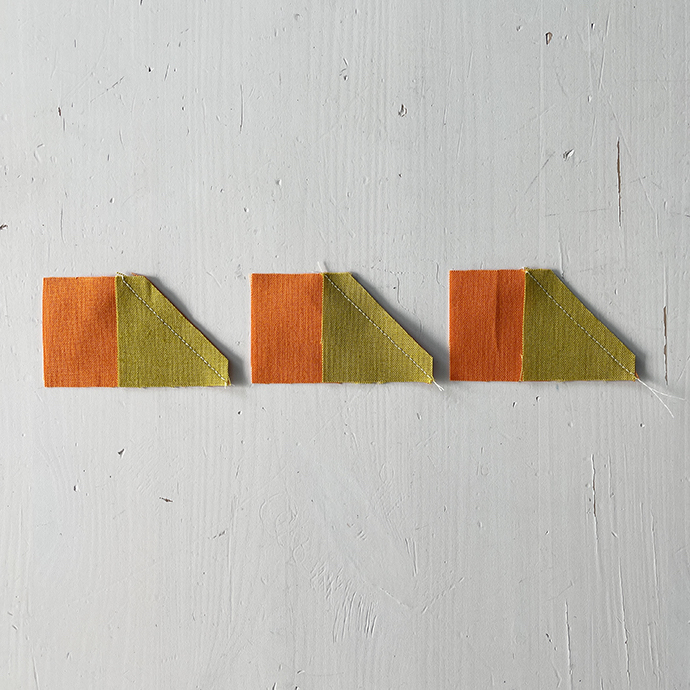
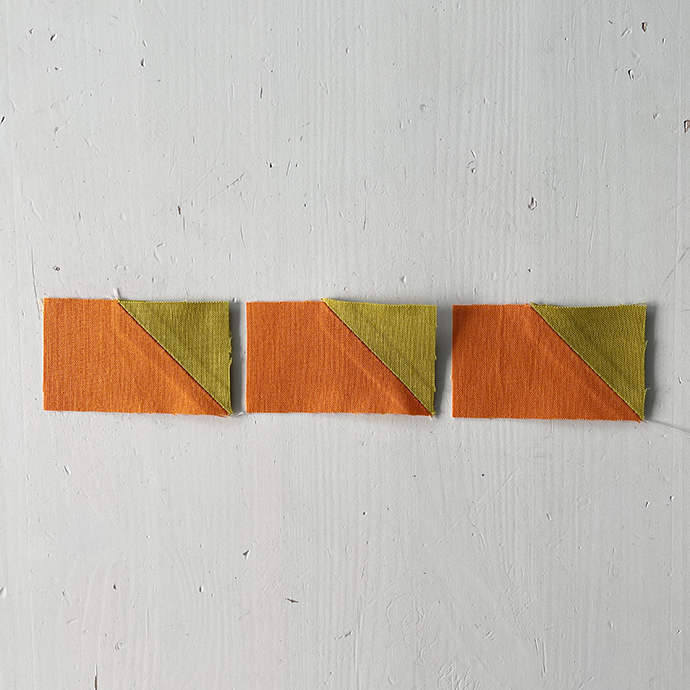
Take a orange square and draw a diagonal line on the wrong side of your fabric. Place it right sides together onto the white square. You can’t see it in the picture because it’s underneath.
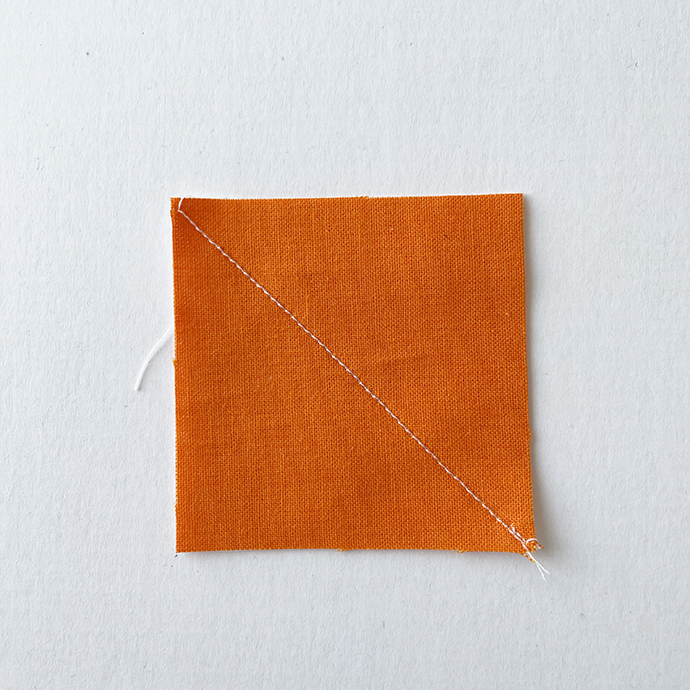
Sew on the drawn line.

Cut 1/4 inch next to your sewn line.

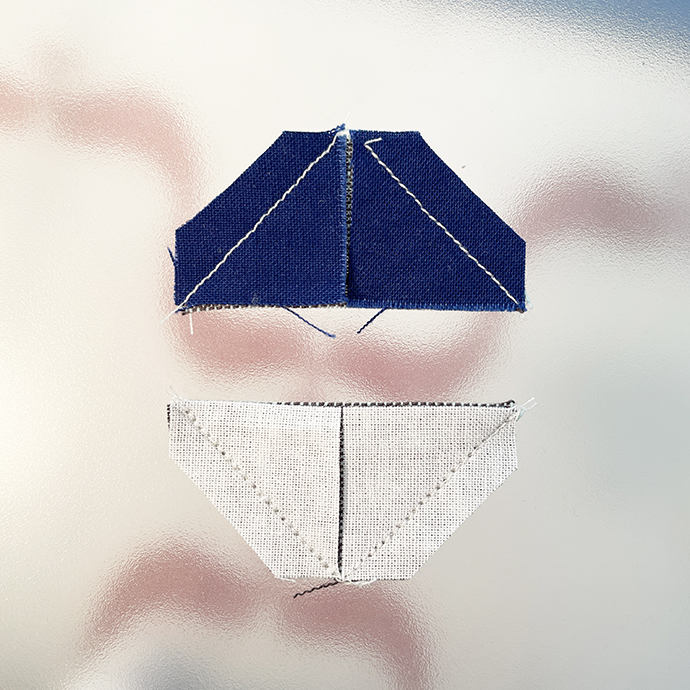
Das ist ein HST.
Press seam open.
Now you have a HST.
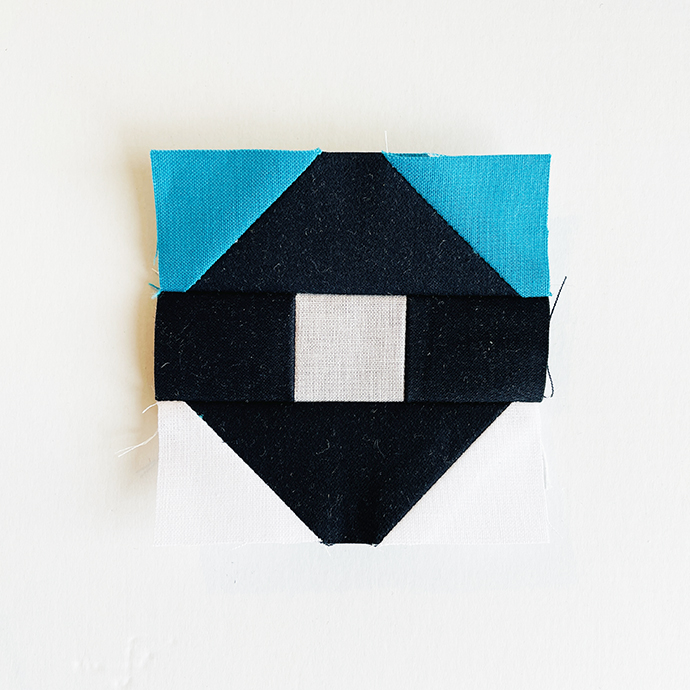
Double Triangle Corner Tutorial
Die Bezeichnung „Double Triangle Corner“ habe ich jetzt mal frei erfunden. Bin mir nicht sicher, ob es in der Quiltersprache dafür einen Ausdruck gibt. Beim vehiclequilt wird manchmal ein weiteres Dreieck auf ein HST genäht. Und das geht so (18 inch Block):
I have now invented the term „Double Triangle Corner“ freely. I’m not sure if there is an expression for it in the quilting language. In my vehiclequilt, sometimes another triangle is sewn onto an HST. And that goes like this (18 inch Block):
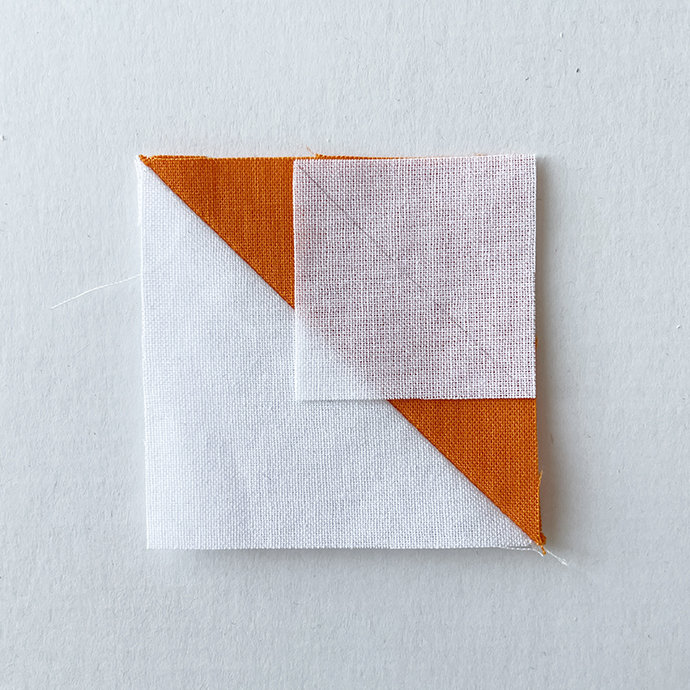
Press seam open.
Take a white square, draw a diagonal line on the wrong side of your fabric and place it right sides together onto the HST (Half Square Triangle).

Sew on the drawn line.

Cut 1/4 inch next to your sewn line.
Press seam open.
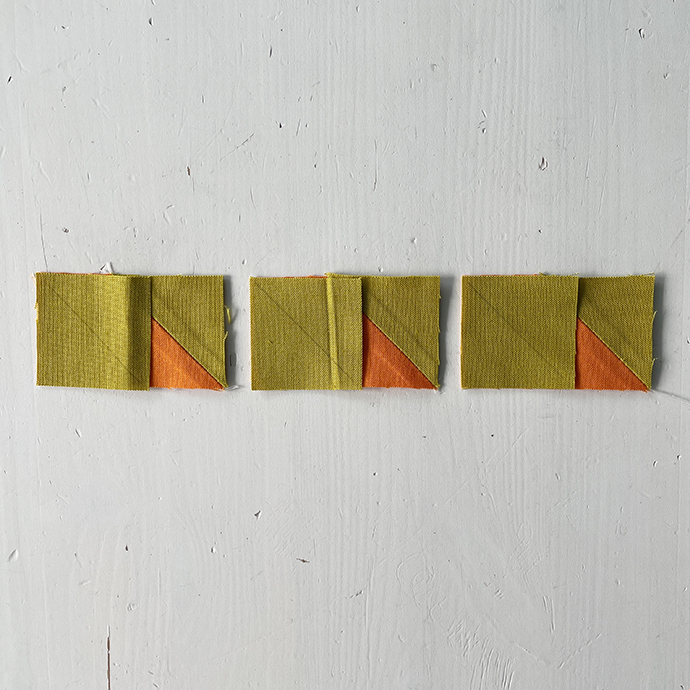
Opposite Triangle Tutorial
Auch hier habe ich den Begriff „opposite triangle rectangle“ frei erfunden. Paßt aber irgendwie. Ziel ist es 2 Dreiecke an ein Rechteck zu nähen, die sich gegenüberstehen. Das Näh-Foto-Tutorial zeigt einen 18 inch Block:
Again, I made up the term „opposite triangle rectangle“. But it fits somehow. The goal is to sew 2 triangles to a rectangle that face each other. The sewing-photo-tutorial shows an 18 inch block:
Take the green square and draw a diagonal line on the wrong side of your fabric. Place it right sides together onto the white rectangle.
Sew on the drawn line.
Cut 1/4 inch next to your sewn line.
Press seam open.
Take the green square and draw a diagonal line on the wrong side of your fabric. Place it right sides together onto the rectangle.
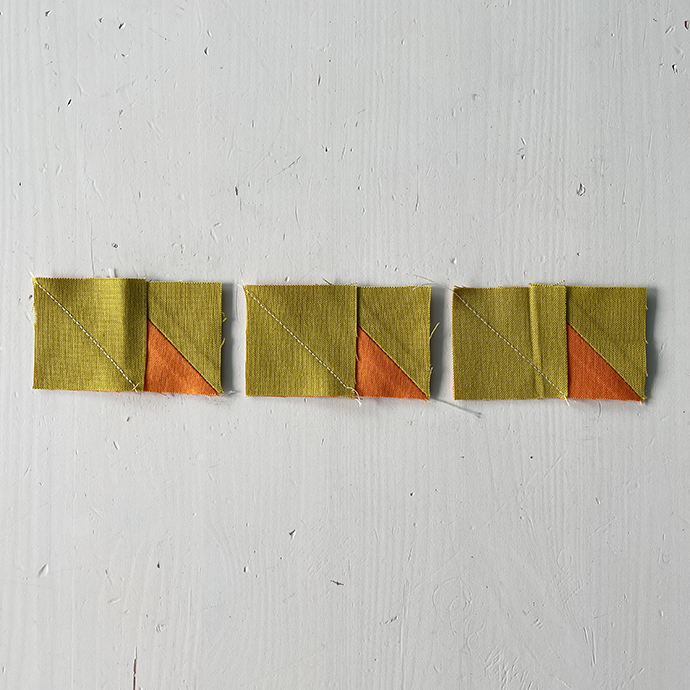
Sew on the drawn line.

Cut 1/4 inch next to your sewn line.
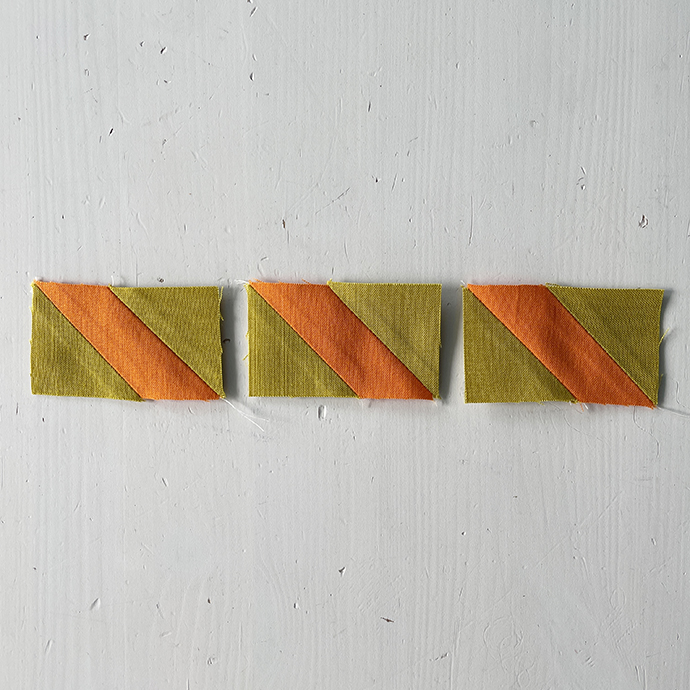
Press seam open.
Räder des 18 inch Blocks / Wheel for the 18 inch Block
Beim Nähen der Räder des #vehiclequilts gibt es die Besonderheit, daß die Teilstücke beim 18 inch Block anders aussehen als beim 9 inch Block und das könnte verwirren. Daher habe ich dieses Kapitel komplett getrennt und ein Näh-Foto-Tutorial für die Räder der 18 inch Blöcke und ein eigenes für die Räder der 9 inch Blöcke gemacht.
When sewing the wheels of the #vehiclequilts, there is the peculiarity that the pieces of the 18 inch block look different from the 9 inch block and that could confuse. Therefore, I have separated this chapter completely and made a sewing photo tutorial for the wheels of the 18 inch blocks and a separate one for the wheels of the 9 inch blocks.
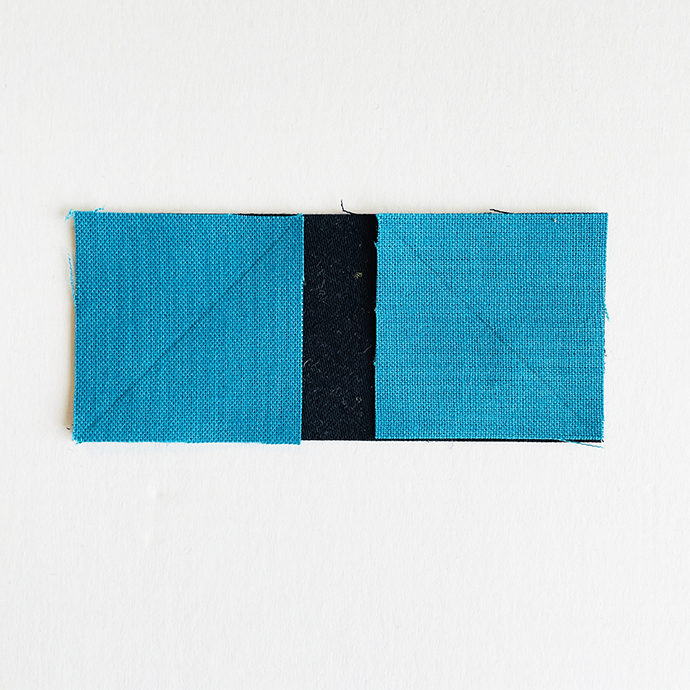
Take 2 blue squares and draw diagonal lines on the wrong side of your fabric. Pay attention to the direction of the lines. Place them right sides together onto the black rectangle.

Sew on the drawn lines.

Cut 1/4 inch next to your sewn lines.
Press seam open.

Repeat the steps from above for your secong flying geese and again pay attention to the direction of the lines.
This is what the finished vehiclequilt wheel looks like on the 18 inch block.
Flying Geese Tutorial – Räder des 9 inch Blocks / Wheel for the 9 inch Block
Bei den #vehicelquilt Block Rädern des 9 inch Blocks nähst Du 2 Flying Geese für den oberen und unteren Teil des Rades. Hierbei verdecken die beiden Quadrate komplett das darunterliegene Rechteck.
For the #vehicelquilt block wheels of the 9 inch block, sew 2 Flying Geese for the top and bottom of the wheel. Here, the two squares completely cover the rectangle underneath.

Take 2 blue squares and draw diagonal lines on the wrong side of your fabric. Pay attention to the direction of the lines. Place them right sides together onto the black rectangle. You won’t see any more of the black rectangle underneath.
Sew on the drawn lines.
Cut 1/4 inch next to your sewn lines.

Press seam open. Take the center piece and sew everything together.

This is what the finished #vehiclequilt wheel looks like on the 9 inch block.
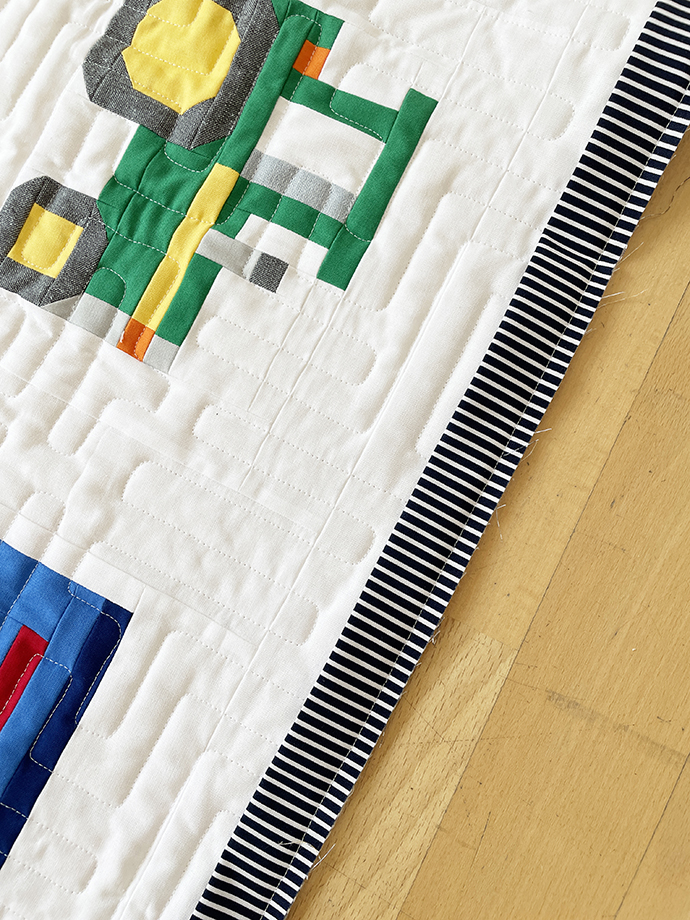
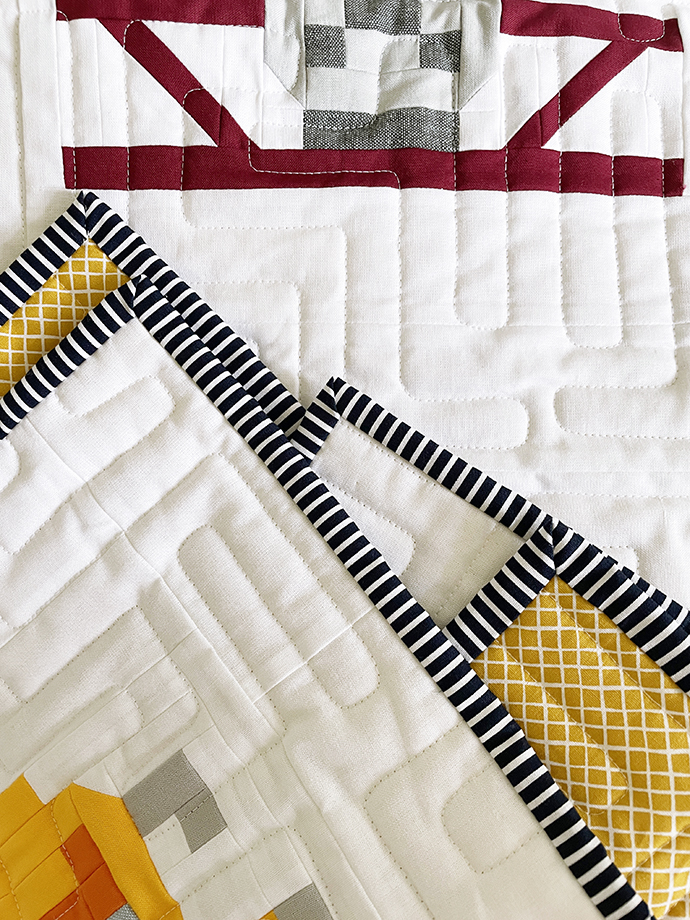
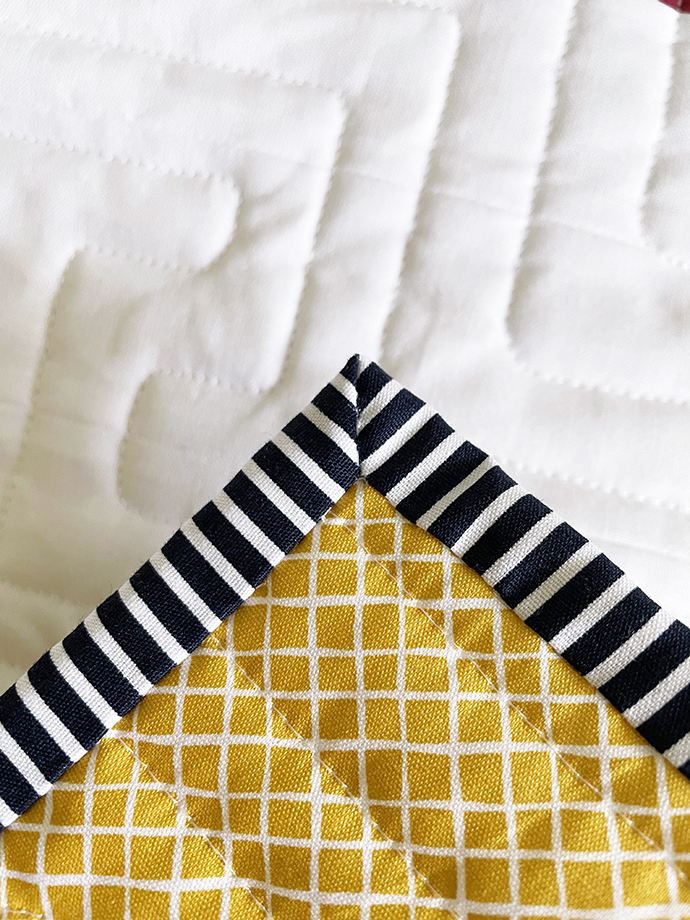
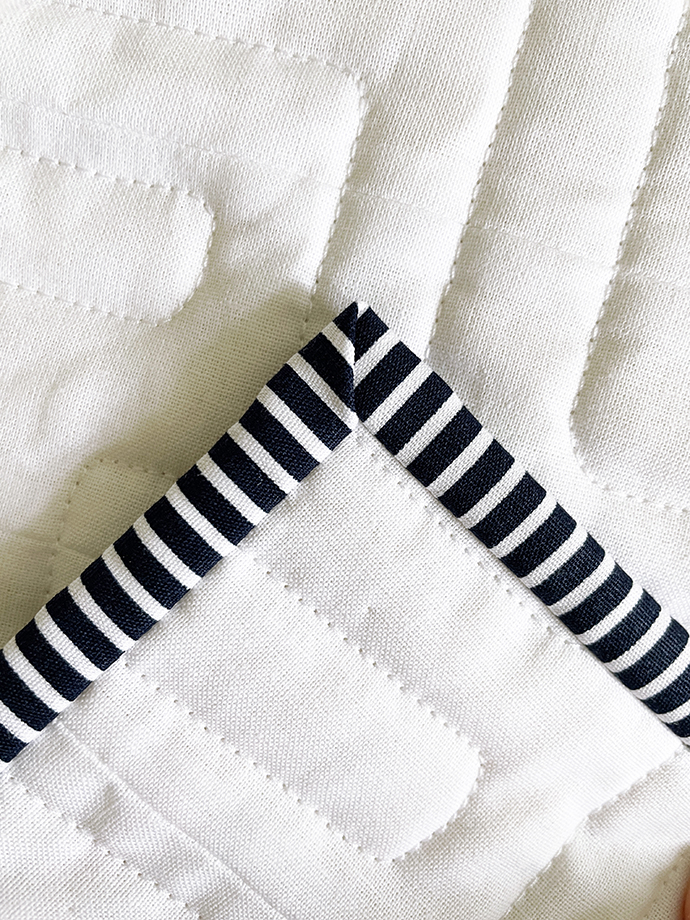
Quilt Binding Tutorial – Binding schließen / How to close binding strips
Das Quilt Binding steht an. Eigentlich ein Schritt, den ich ganz gerne mache, da es der letzte Schritt ist und somit der Quilt fast fertig ist.
The quilt binding is up next. Actually a step I quite like to do, since it is the last step and thus the quilt is almost finished.

Die Breite des Bindings kann ja ganz individuell gewählt werden. Ich entscheide mich meistens zwischen einer Breite von 2 1/4 und 2 1/2 inch. Diesmal ist es die Breite von 2 1/2 inch. In der #vehiclequilt Anleitung findet Ihr die Angaben für das benötigte Binding für die ver. Quiltgrößen.
The width of the binding can be chosen individually. I usually decide between a width of 2 1/4 and 2 1/2 inches. This time it is the width of 2 1/2 inch. In the #vehiclequilt pattern you will find the cutting instruction for the required binding for the different quilt sizes.
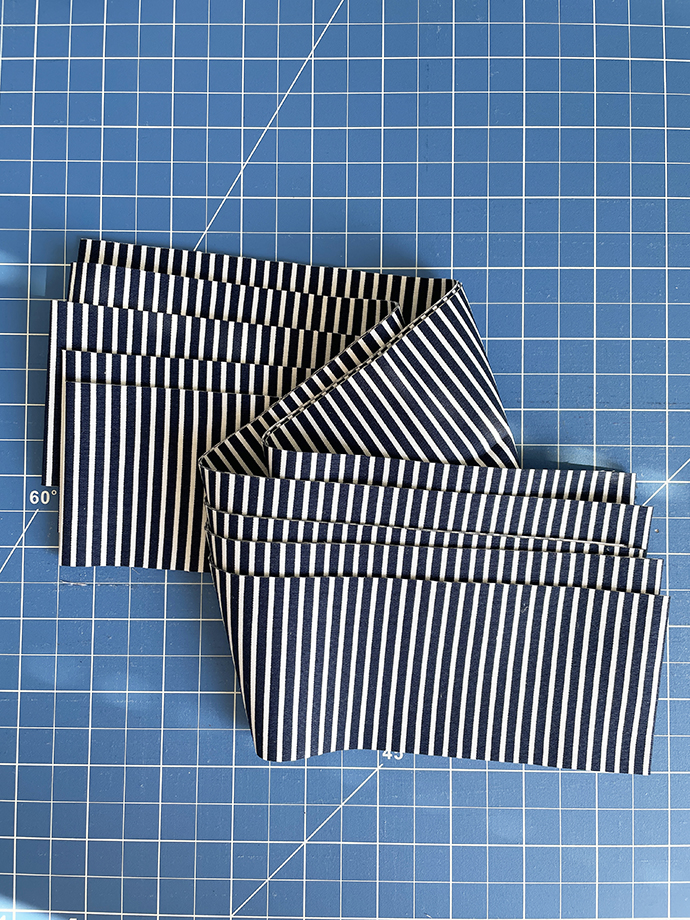
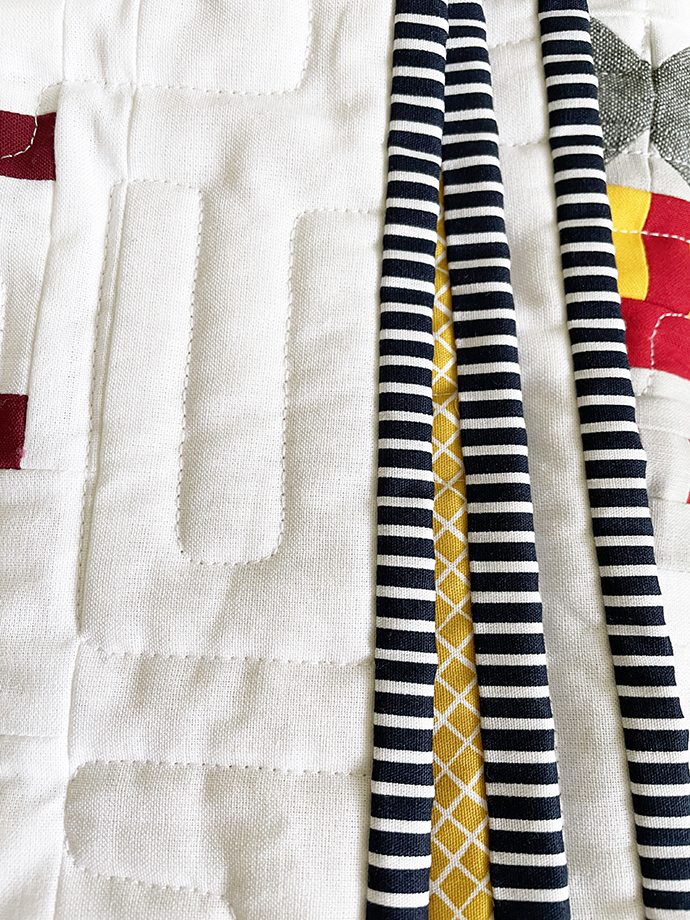
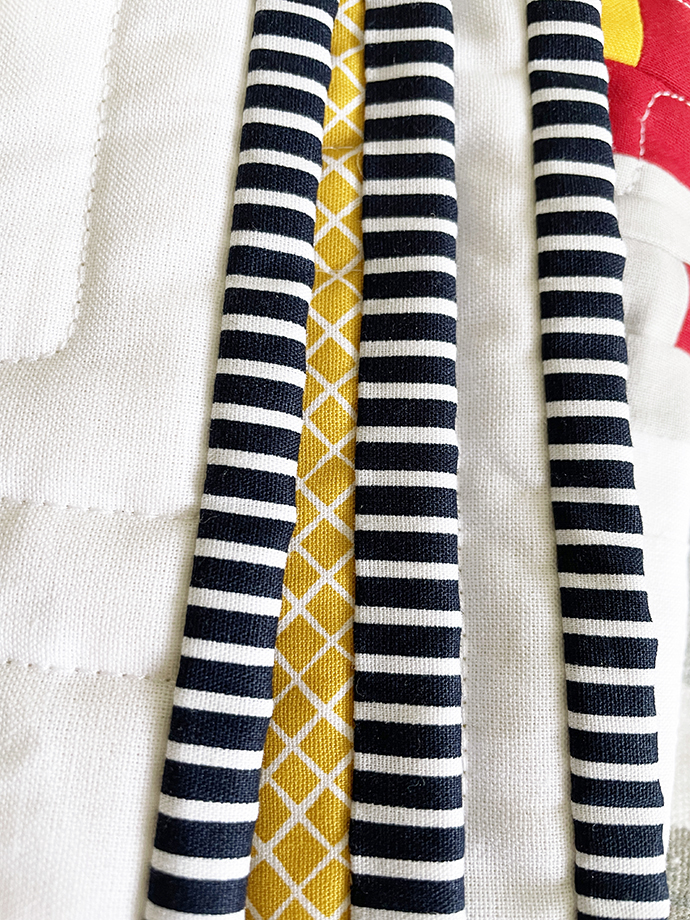
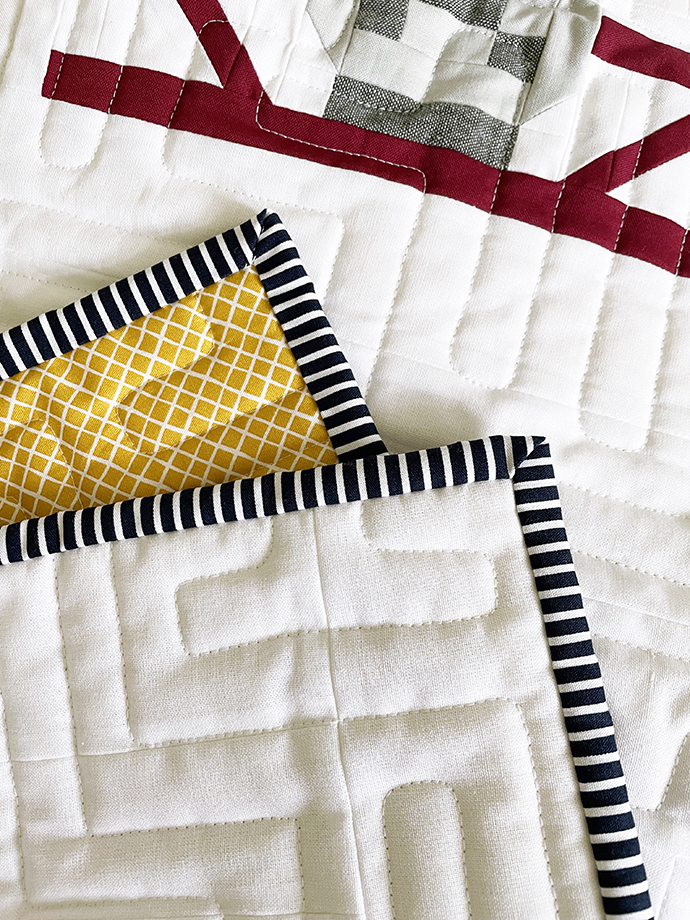
Da ich den 5×5 Blöcke Quilt genäht habe, reichen bei mir fünf 2 1/2 inch Streifen. Diese nähe ich diagonal zusammen und falte und bügel den langen Bindingstreifen längs in der Mitte.
Since I sewed the 5×5 blocks quilt, five 2 1/2 inch strips are all I need. I sew these together diagonally and fold and press the long binding strip lengthwise.

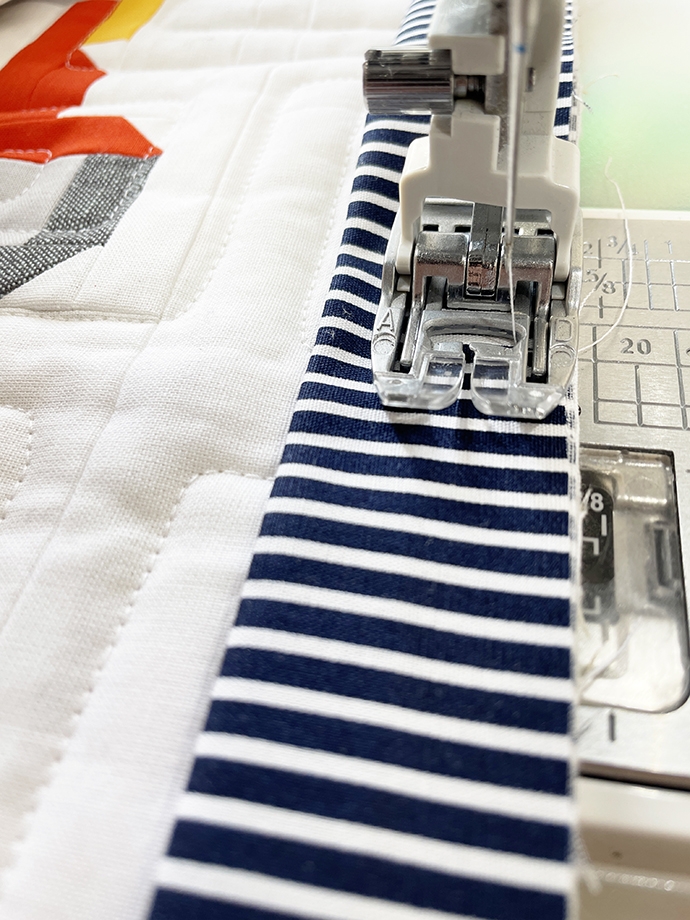
Bevor ich mit dem Annähen des Bindings beginne, wechsel ich noch meinen Nähfuß. Ich verwende hier gerne den Obertransportfuß, damit das Binding samt Quilsandwich gut durch die Maschine gezogen wird.
Before I start sewing on the binding, I change my sewing foot. I like to use the walking foot so that the binding, including the quilt sandwich, is pulled well through the machine.

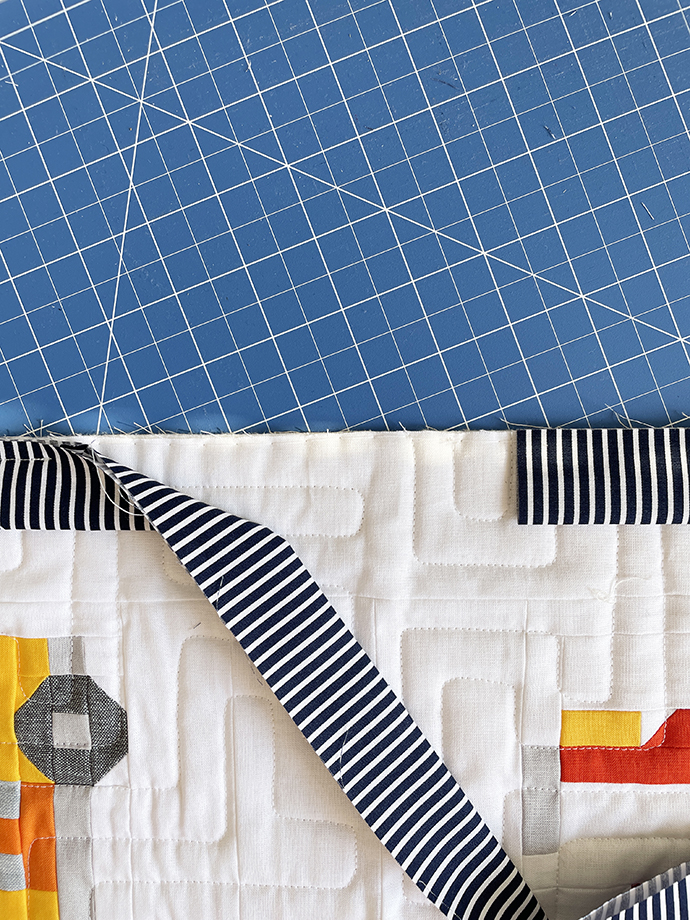
Den Anfang des Bindingstreifens lege ich mir in die Mitte einer Quiltseite. Ca. 10 inch des Bindings lasse ich frei, dann fange ich an, diesen auf der Vorderseite des Quilts anzunähen. Am Anfang gut verriegeln, das ist dann für das Zusammenfügen des Bindings wichtig.
I place the beginning of the binding strip in the center of one side of the quilt. I leave about 10 inches of the binding free, then I start sewing it on the front of the quilt. Backstitch well at the beginning, this is then important for closing the binding strips.


Leave a 10 inch tail and start sewing.
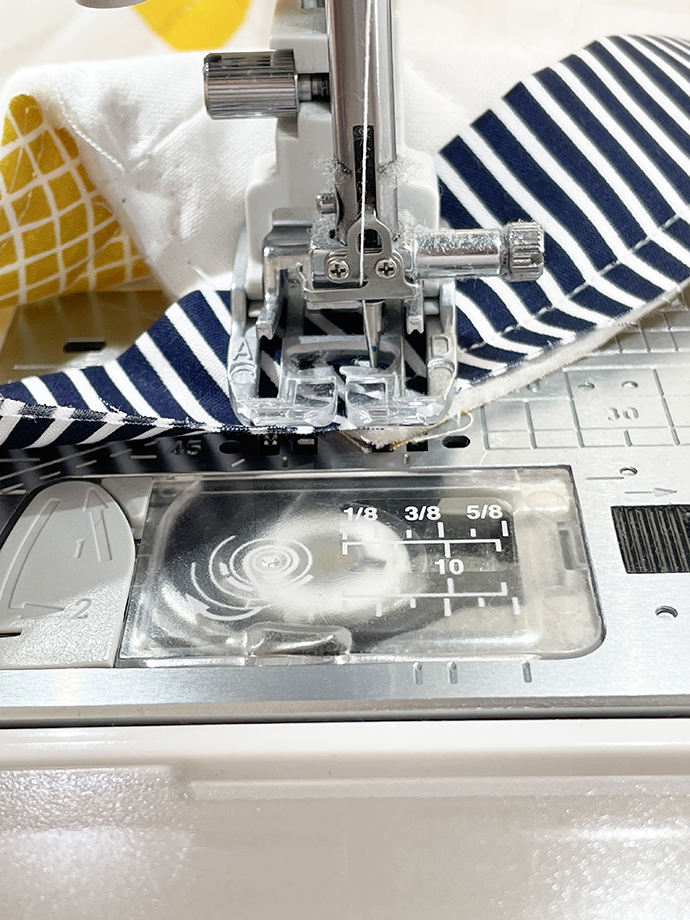
Bei meiner Maschine ist der Abstand zwischen rechter Seite Obertransportfuß und Nadel großzügige 1/4 inch breit. Es ist minimal mehr, aber das paßt mit der Breite des Bindings. Genäht wird bis zur ersten Ecke.
On my machine, the distance between the right side top walking foot and the needle is a generous 1/4 inch wide. It is minimally more, but that fits with the width of the binding. Sew till you reach your first corner.
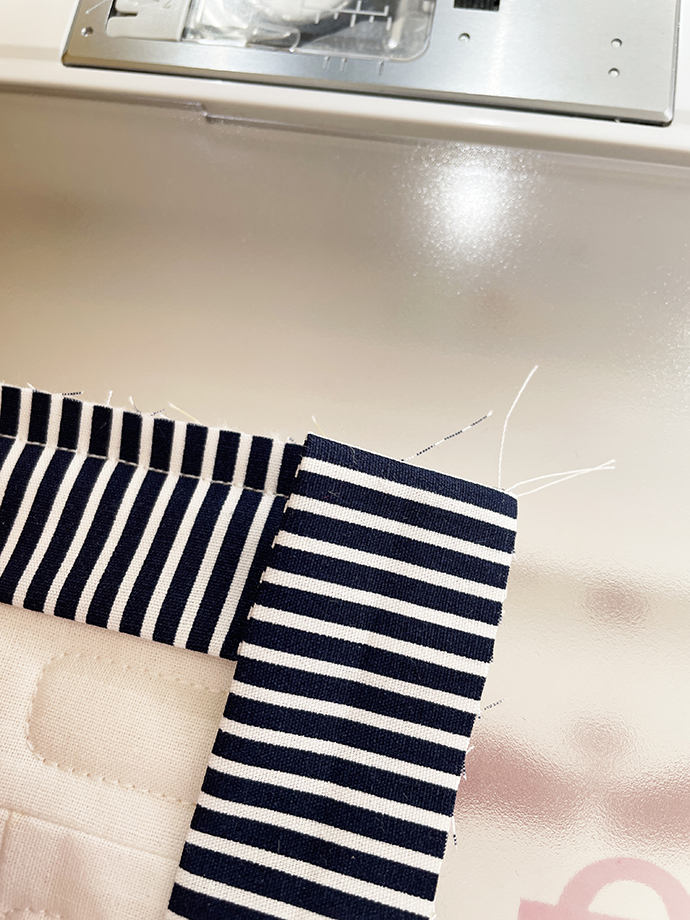
1/4 inch vor der Ecke höre ich auf zu nähen. Ich lasse die Nadel abgesenkt im Stoff und drehe meinen Quilt um 45° Grad. Die Ecke zeigt jetzt direkt zu mir. Habe das mit der roten Linie gekennzeichnet. Dieses kleine Stück wird jetzt genäht, genau bis zur Ecke. Dann den Faden abschneiden.
1/4 inch before I reach the corner I stop sewing. I leave the needle down and turn my quilt 45 degrees. The corner is now facing me directly. Have marked this with the red line. Sew right up to the corner. Then cut the thread.
Rotate your quilt 45° degrees with the needle lowered.
Sew to the corner of your quilt
Die folgenden Bilder zeigen, wie die seitliche Naht und die Naht im 45° Grad Winkel aussieht.
The following pictures show what the side seam and the seam at 45° degrees look like.


Das freie Ende des Bindings klappe ich um 90° Grad nach oben.
I flip the free end of the binding up 90 degrees.

Flip the loose end up 90° degrees.
Das gleiche lose Ende klappe ich dann um 180° Grad nach unten. Somit liegt das Binding oben und seitlich exakt am Rand des Quilts. Dieses gefaltete Binding samt Quilt lege ich unter die Maschine und nähe wieder mit einer 1/4 inch Naht los. Das wiederhole ich bei allen 3 weiteren Ecken.
I then fold the same loose end down 180 degrees. This way the binding is exactly at the top and sides of the quilt. I put this folded binding and quilt back under the machine and start sewing again with a 1/4 inch seam. I repeat this for all 3 other corners.
Fold the same loose end down 180 degrees.

Start sewing with 1/4 inch seam allowance again.
Wenn ich zum Anfang meines Bindings komme, höre ich ca. 10-12 inch davor auf zu nähen und verriegel die Naht wieder gut.
Jetzt geht es an das Zusammensetzen des Bindings. Für viele ein unliebsamer Schritt, aber wenn man einmal den Dreh raus hat, ist es wirklich einfach. Vor mir liegen die beiden Enden des Bindings und die Lücke.
When I get to the beginning of my binding, I stop sewing about 10-12 inches before that and backstitch the seam well.
Now it’s time to close the binding strips. For many an unpleasant step, but once you get the hang of it, it’s really easy. In front of me are the two binding ends and the gap.
Leave an open gap of about 10-12 inches.
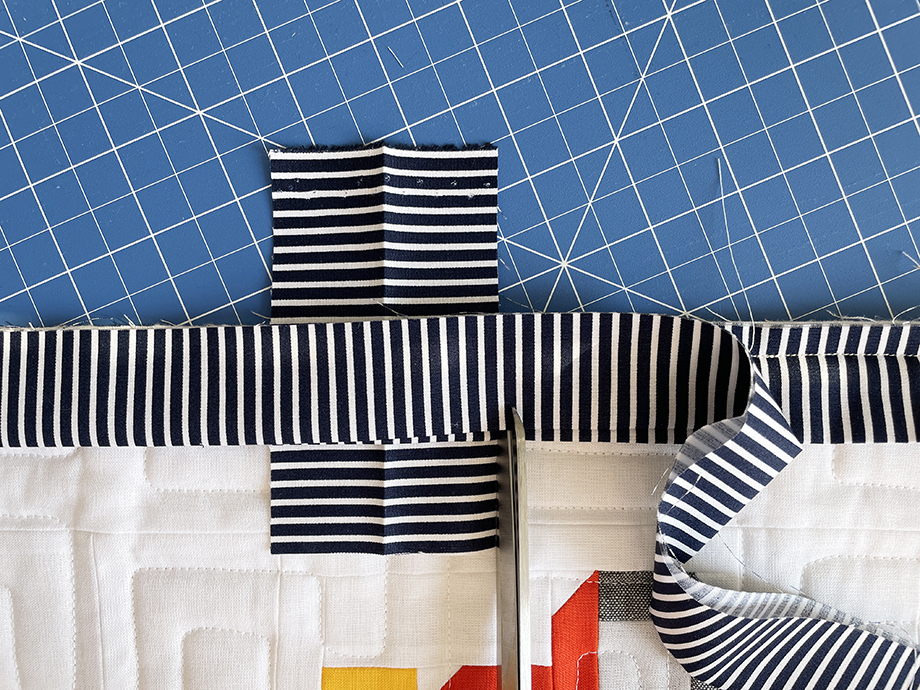
Ich nehme mir eins der Enden des Bindings (ich habe das rechte genommen) und schneide es in der Mitte der „Lücke“ ab. Jetzt habe ich eine gerade Kante.
I take one of the binding ends (I took the right one) and cut it in the middle of the „gap“. Now I have a straight edge.
Cut one end of the binding in the middle of the gap (about 5 inch from ypur last seam).
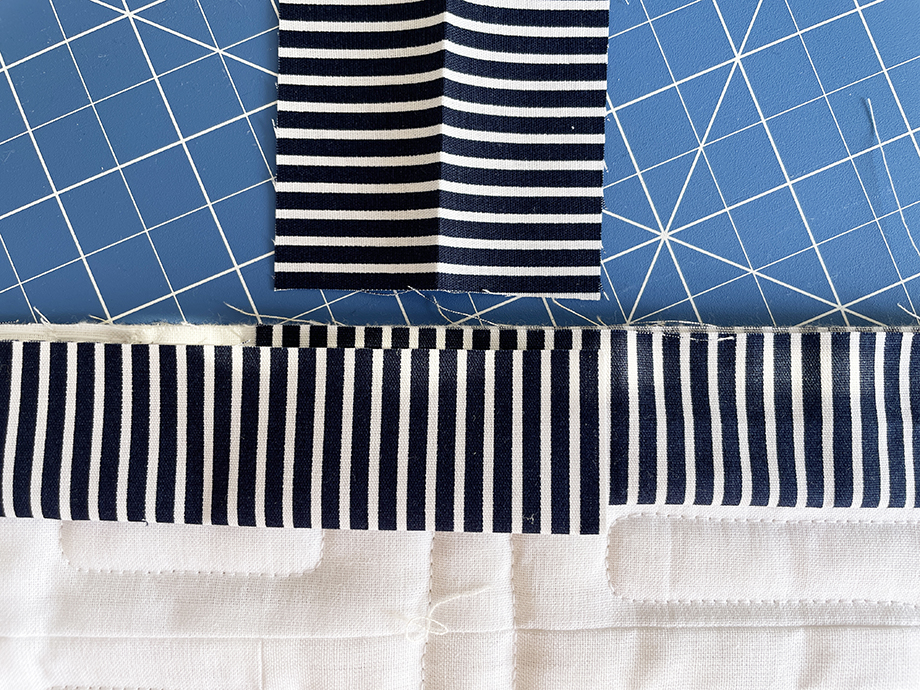
Das abgeschnittene Stück Binding falte ich auseinander und habe somit eine exakte Breite von 2 1/2 inch. Dieses lege ich geöffnet unter mein rechtes Binding Ende, genau abschließend mit dem Ende des rechten Bindings. Jetzt nehme ich das linke Ende des Bindings und lege es über das auseinandergefaltete Stück Binding und das rechte Ende meines Bindings.
I unfold the cut piece of binding to have an exact width of 2 1/2 inches. I place this open under my right binding end, exactly flush with the end of the right binding. Now I take the left end of the binding and place it over the unfolded piece of binding and the right end of my binding.

One end of the binding overlaps the 2 1/2 inch wide open binding.

The other end of the binding overlaps the 2 1/2 inch wide open binding.
Jetzt kommt der spannenden Teil. Das überlappende Ende des linken Bindings schneide ich genau da ab, wo das auseinandergefaltete Stück Binding endet. Mein rechtes und linkes Binding überlappen sich somit exakt 2 1/2 inch.
Now comes the exciting part. I cut off the overlapping end of the left binding exactly where the unfolded piece of binding ends. My right and left binding strips overlap exactly 2 1/2 inches.
Cut the other end of the binding.
Both ends of the binding overlap by 2 1/2 inches.
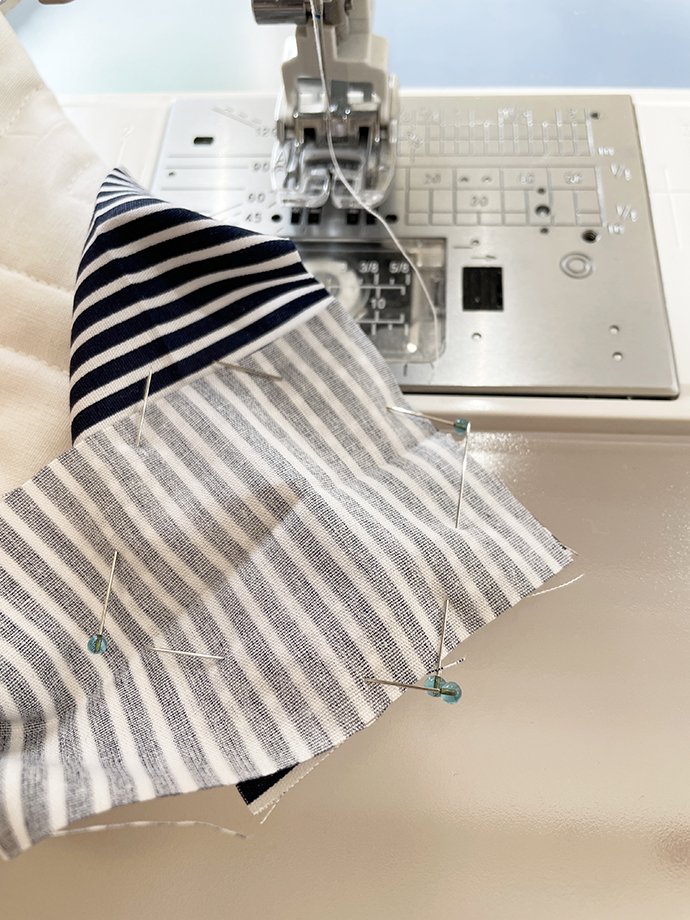
Die beiden losen Ende des Biding füge ich jetzt so zusammen, wie ich auch meine Bindingstreifen zusammengenäht habe. Ich stecke das immer gerne mit 4 Nadeln ab, damit nichts verrutscht, da die Quiltseite etwas gespannt ist.
I now join the two loose ends of the biding together the same way I sewed my binding strips together. I always like to pin this with 4 pins so that nothing slips, since the quilt side is a little taut.
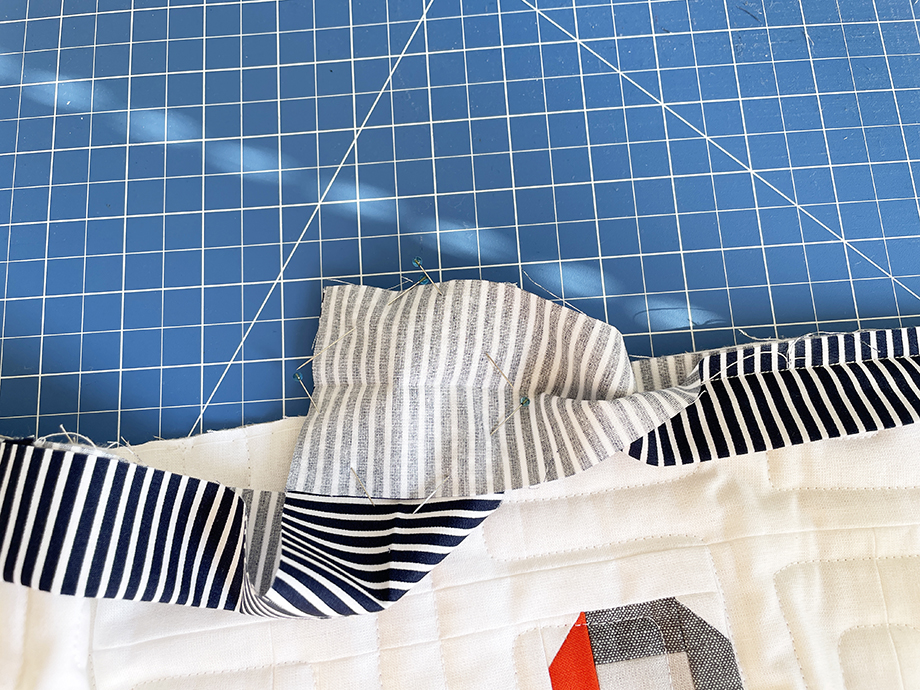
Use some pins to close the two loose ends of the bindings strips.
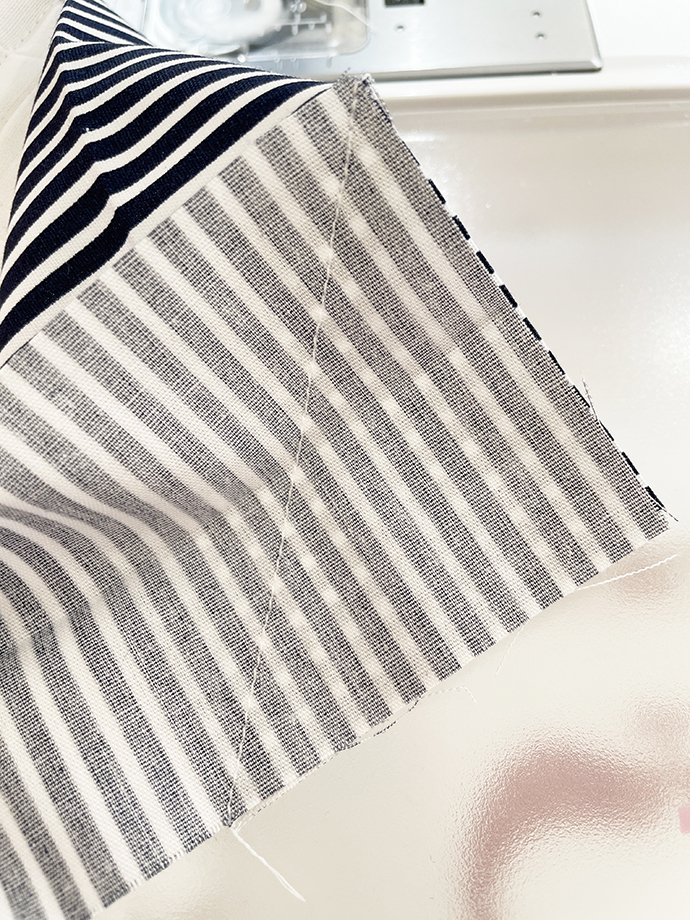
Jetzt wird der Quilt etwas gefaltet – zusammengepackt, damit man das Binding gut zusammennähen kann. Mit diesem Quiltpaket geht es an die Maschine. Vorher hatte ich ja erwähnt, am Anfang und Ende die Naht gut zu verriegeln. Das ist deshalb wichtig, weil sich sonst die Naht bei diesem Schritt durch das etwas unsanfte Zusammenknautschen des Quilts lösen kann. Genäht wird diagonal von Ecke zu Ecke.
Now the quilt is folded a little – packed together, so that you can sew the binding together well. Take your quilt package to the machine. Earlier I mentioned to backstitch the seam well at the beginning and end. This is important because otherwise the seam can come loose during this step due to the quilt being scrunched together a bit roughly. Sew diagonally from corner to corner.

Sew diagonally from corner to corner.
Hier ist es wirklich hilfreich mit Nadeln zu arbeiten, da die Enden des Bindings immer etwas „abhauen“ wollen. Am Ende habe ich eine saubere Naht, die meine beiden Enden des Bindings zusammenhält.
This is where it’s really helpful to work with needles, because the ends of the binding always want to „take off“ a bit. In the end I have a neat seam holding my two ends of the binding together.

Before cutting, check again that the binding closes the gap.
Bevor Ihr 1/4 inch neben der Naht die Nahtzugabe abschneidet, überpüft nochmal, ob das Binding genau die Lücke schließt. Wenn es paßt, die Nahtzugabe abschneiden und diese mit dem Finger auseinander bügeln. Das geht auch ohne Bügeleisen ganz gut.
Before you cut the seam allowance 1/4 inch from the seam, check again to make sure the binding closes the gap exactly. If it fits, cut off the seam allowance and press it open with your finger. This works quite well without an iron.


Das zusammengenähte Binding falte ich jetzt wieder und nähe noch den Rest des Bindings fest.
I now fold the sewn binding again and sew the rest of the binding in place.
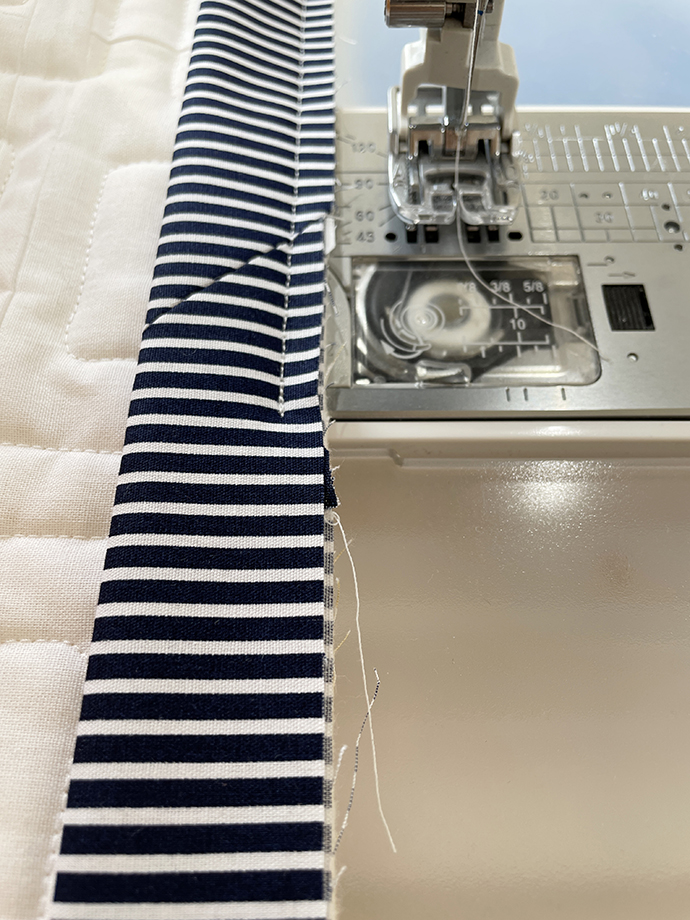
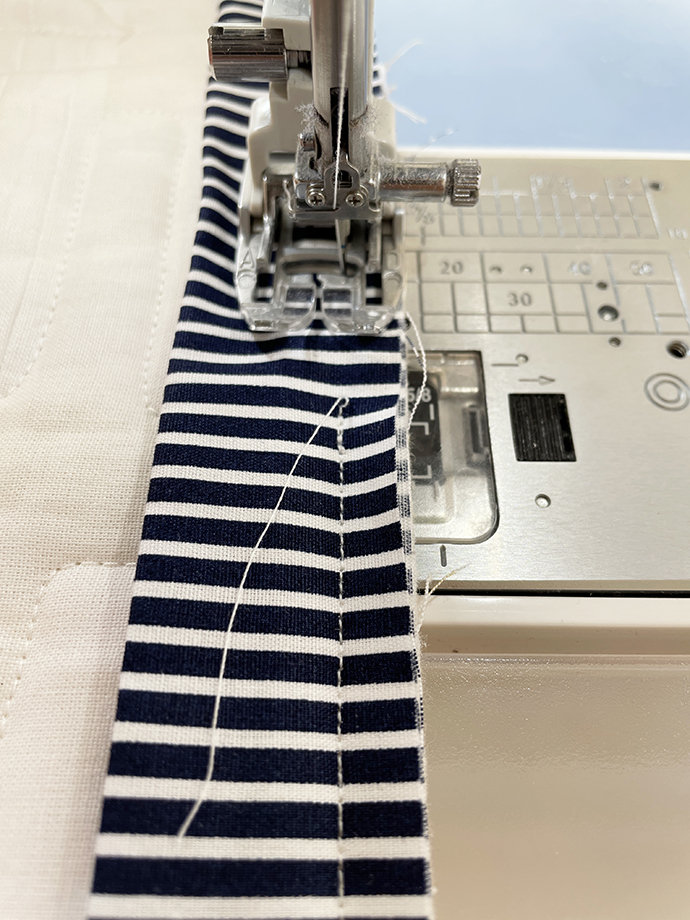
Eine Seite des Bindings ist jetzt angenäht.
One side of the binding is now sewn on.
Diesmal habe ich das Binding mit der Hand an der Rückseite festgenäht. Das mache ich wirklich sehr selten, aber bei diesem Quilt war es mir wichtig, daß es wirklich gut aussieht und man keine Naht auf dem Binding sieht.
This time I hand stitched the binding to the back. I really do this very rarely, but for this quilt it was important to me that it looked really good and you couldn’t see any stitching on the binding.
Beim Handbinding sieht die Vorderseite des Bindings wirklich genau aus wie die Rückseite.
With hand binding, the front of the binding really looks just like the back.
Schickt mir Eure Fragen zum #vehiclequilt /
send me your questions about the #vehiclequilt
Das sind also die ersten Tipps und Tricks für den #vehiclequilt. Bitte schick mir gerne Deine Fragen. Dann kann ich Antworten oder Erklärungen in diesen Beitrag aufnehmen.
Bis dahin viel Spaß beim Nähen!
So those are the first tips and tricks for the #vehiclequilt. Please feel free to send me your questions. Then I can include answers or explanations in this post.
Happy sewing!
You might also like
Leave A Reply