Du bist hier / you’re here: Home / Posts / Basic Quilt Tutorial – Flying Geese
Mit dem heutigen Beitrag möchte ich eine neue Serie eröffnen. In kurzen und übersichtlichen Schritten zeige ich Euch anhand von Grafiken, einige Basics des Quiltens. In diesem Beitrag geht es um eine der Methoden „Flying Geese“ zu nähen.
With today’s post I would like to open a new series. In short and clear steps I show you with the help of graphics, some basics of quilting. This post is about one of the methods of sewing „Flying Geese“.
Flying Geese
Der Flying Geese Block ist ein sehr bekannter und oft verwendeter Patchwork Block. Es gibt etliche wunderschöne Quilt Anleitungen, die Flying Geese Blöcke verwenden. In meinem Pinterest Account habe ich dazu eine „Flying Geese Quilts “ Pinnwand erstellt.
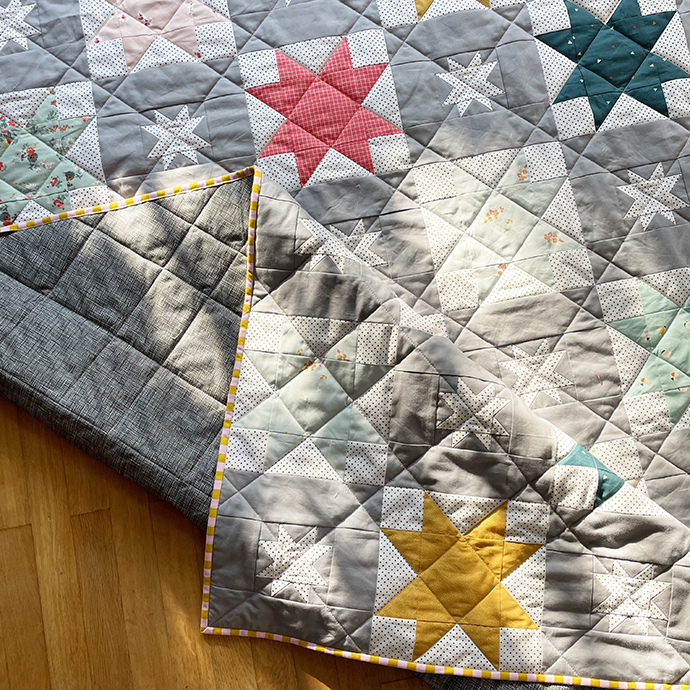
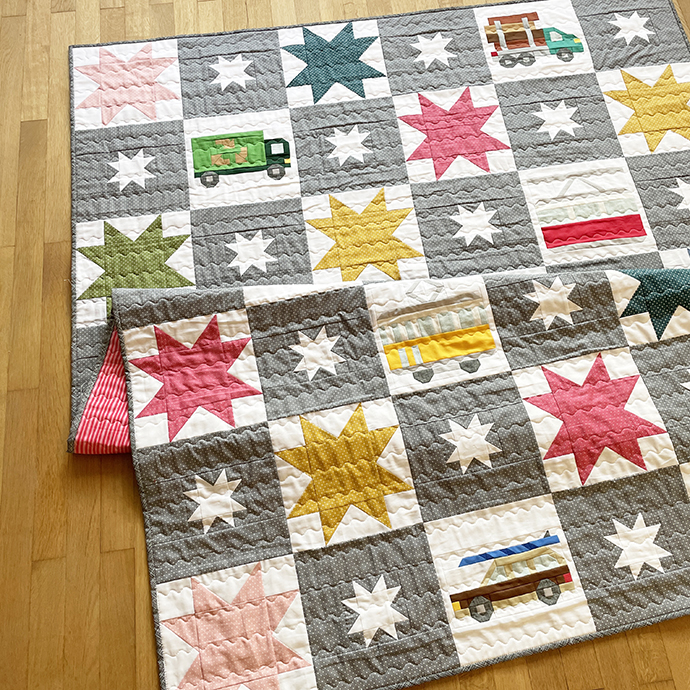
Der Flying Geese Block wird auch oft als Grundform für Stern-Blöcke verwendet. Ich arbeite gerade noch an meiner neuesten Anleitung „Happy Star Quilt“, bei dem ich auch viel mit Flying Geese arbeite.
The Flying Geese block is a very well known and often used patchwork block. There are several beautiful quilt patterns that use Flying Geese blocks. I have created a „Flying Geese Quilts “ pinboard on my Pinterest account. The Flying Geese block is also often used as a basic shape for star blocks. I’m still working on my latest pattern „Happy Star Quilt“, where I also work a lot with Flying Geese.
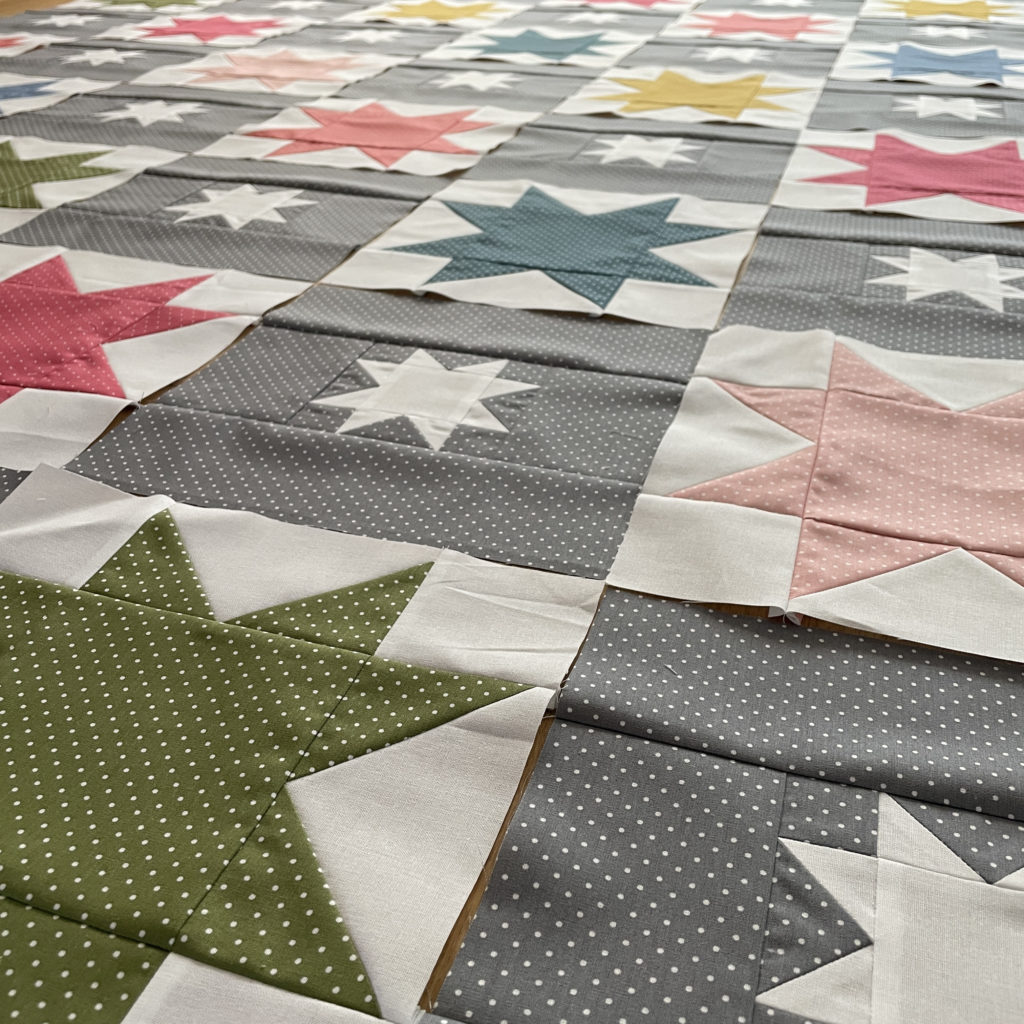
Die Form des Flying Geese ist ein Rechteck, das doppelt so lang wie hoch ist. An beiden Seiten des Rechtecks sind Dreiecke. Es gibt verschiedene Methoden den Flying Geese Block zu nähen. Heute zeige ich Euch eine davon.
The shape of the Flying Geese is a rectangle that is twice as long as it is high. On both sides of the rectangle are triangles. There are different methods to sew the Flying Geese block. Today I will show you one of them.
Die Flying Geese – „4 at a time“ Methode /
The Flying Geese – „4 at a time“ method
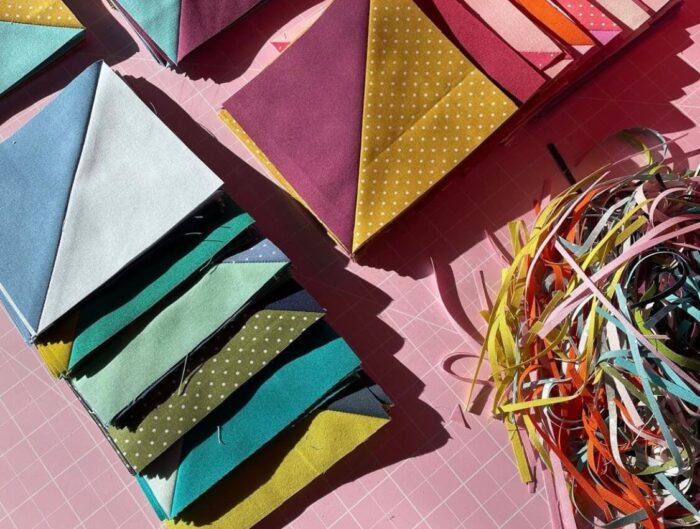
Die „4 at a time“ Methode ist die schnellste Art Flying Geese zu nähen. Wie der Name schon verrät, habe ich mit nur wenigen Nähschritten gleich 4 Flying Geese.
The „4 at a time“ method is the fastest way to sew Flying Geese. As the name suggests, with just a few sewing steps I have 4 Flying Geese at once.

Flying Geese Rechnung / The Flying Geese math
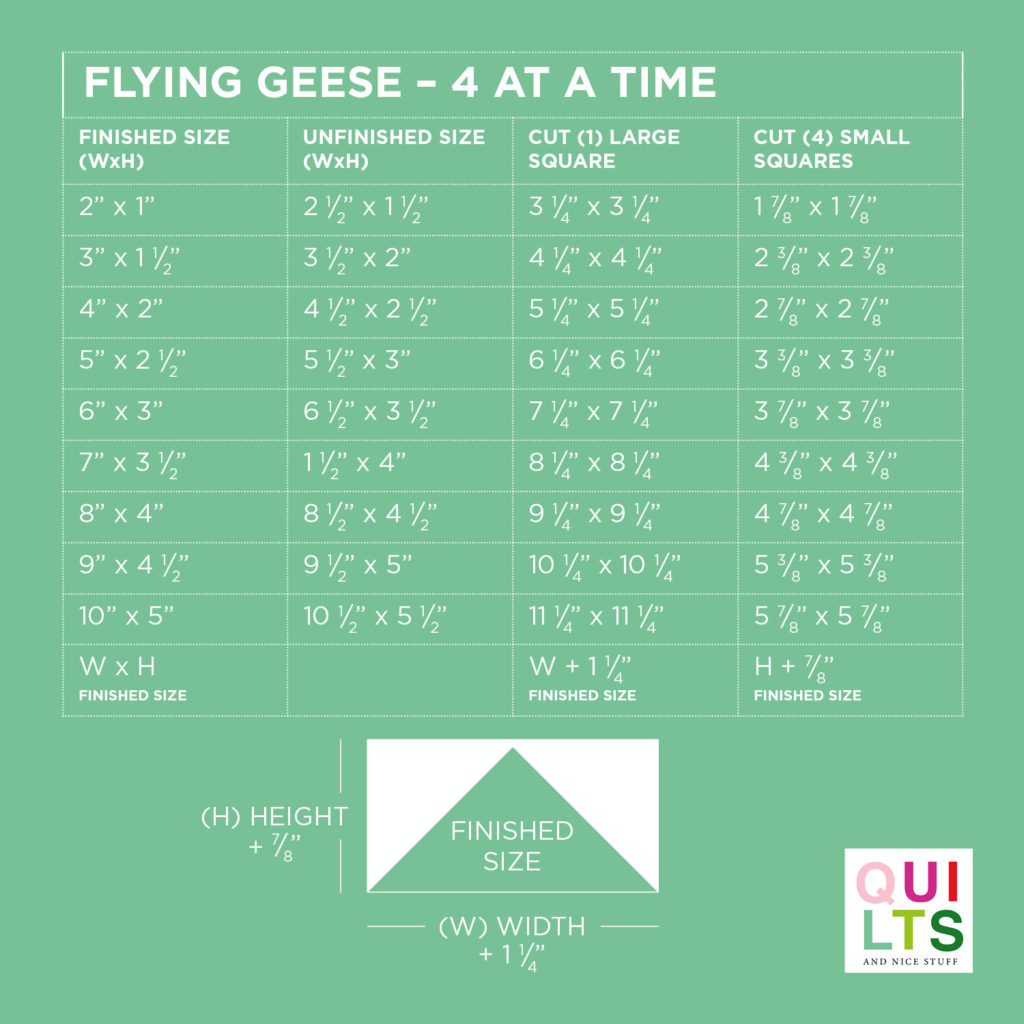
Für die „4 at a time“ Methode brauchst Du 1 großes Quadrat und 4 kleine Quadrate. Die Maße kannst Du aus der Tabelle unten entnehmen. Es gibt aber auch eine einfache Rechenmethode, die Du anwenden kannst.
Zur Breite (finished size*) des gewünschten Flying Geese addierst Du 1 1/4″ – so erhälst Du die Größe für (1) großes Quadrat.
Zur Höhe (finished size*) des gewünschten Flying Geese addierst Du 7/8″ – so erhälst Du die Grüße für die (4) kleinen Quadrate.
Beispiel:
- Breite x Höhe: 4″ x 2″ (finished size*)
- Breite x Höhe: 4 1/2″ x 2 1/2″ (unfinished size**)
- Breite: 4″ + 1 1/4″ = 5 1/4″, schneide (1) großes Quadrat 5 1/4″ x 5 1/4″
- Höhe: 2″ + 7/8″ = 2 7/8″, schneide (4) kleine Quadrate 2 7/8″ x 2 7/8″
*finished size: Blockgröße ohne Nahtzugabe / **unfinished size: Blockgröße mit 1/4 Nahtzugabe
For the „4 at a time“ method you need 1 large square and 4 small squares. You can get the measurements from the chart below. But there is also a simple math you can do.
Add 1 1/4″ to the width (finished size*) of the Flying Geese – this will give you the size for (1) large square.
Add 7/8″ to the height (finished size*) of the Flying Geese – this will give you the size for the (4) small squares.
Example:
- Width x height: 4″ x 2″ (finished size*)
- Width x height: 4 1/2″ x 2 1/2″ (unfinished size**)
- Width: 4″ + 1 1/4″ = 5 1/4″, cut (1) large square 5 1/4″ x 5 1/4″
- Height: 2″ + 7/8″ = 2 7/8″, cut (4) small squares 2 7/8″ x 2 7/8″
*finished size: block size without seam allowance / **unfinished size: block size with 1/4 seam allowance
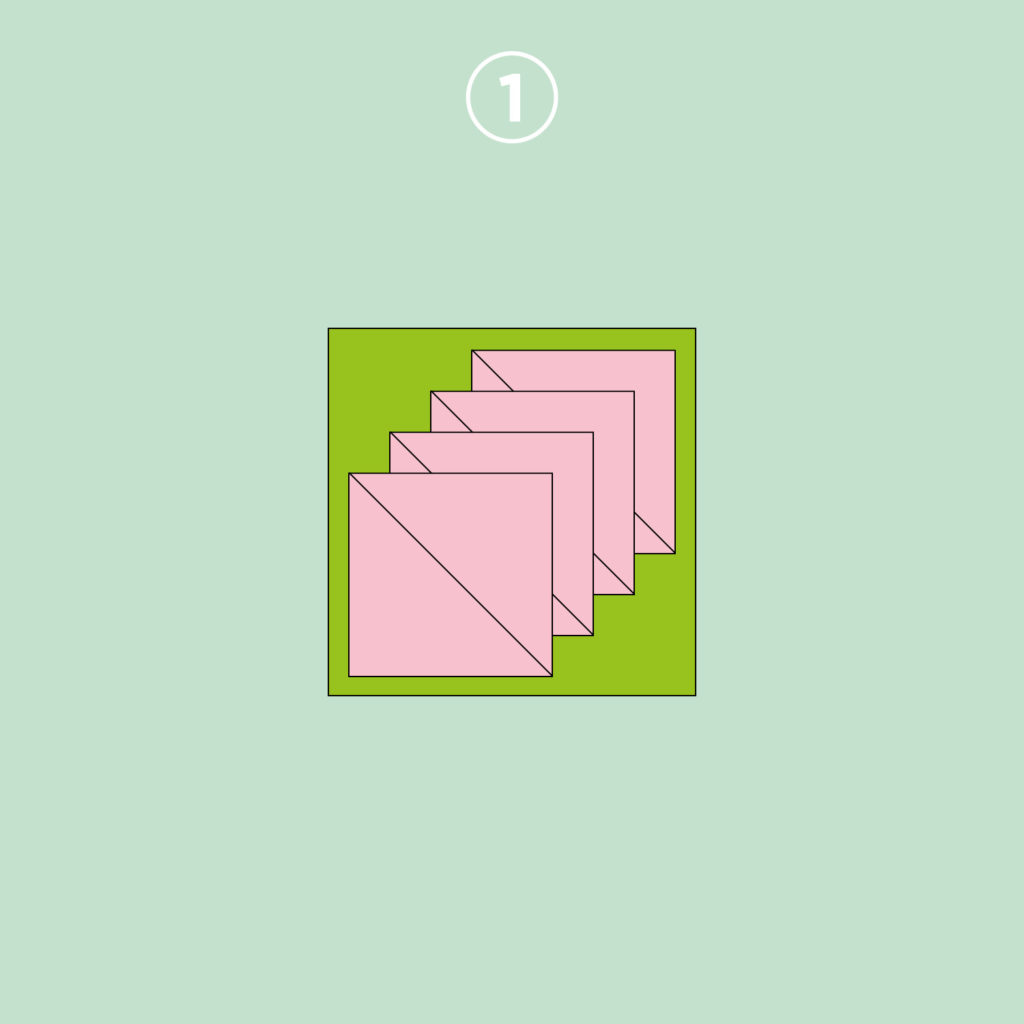
Schritt 1 / Step 1
Zeichne auf die Rückseite der 4 kleinen Quadrate jeweils eine diagonale Linie.
Draw a diagonal line on the back of each of the 4 small squares.
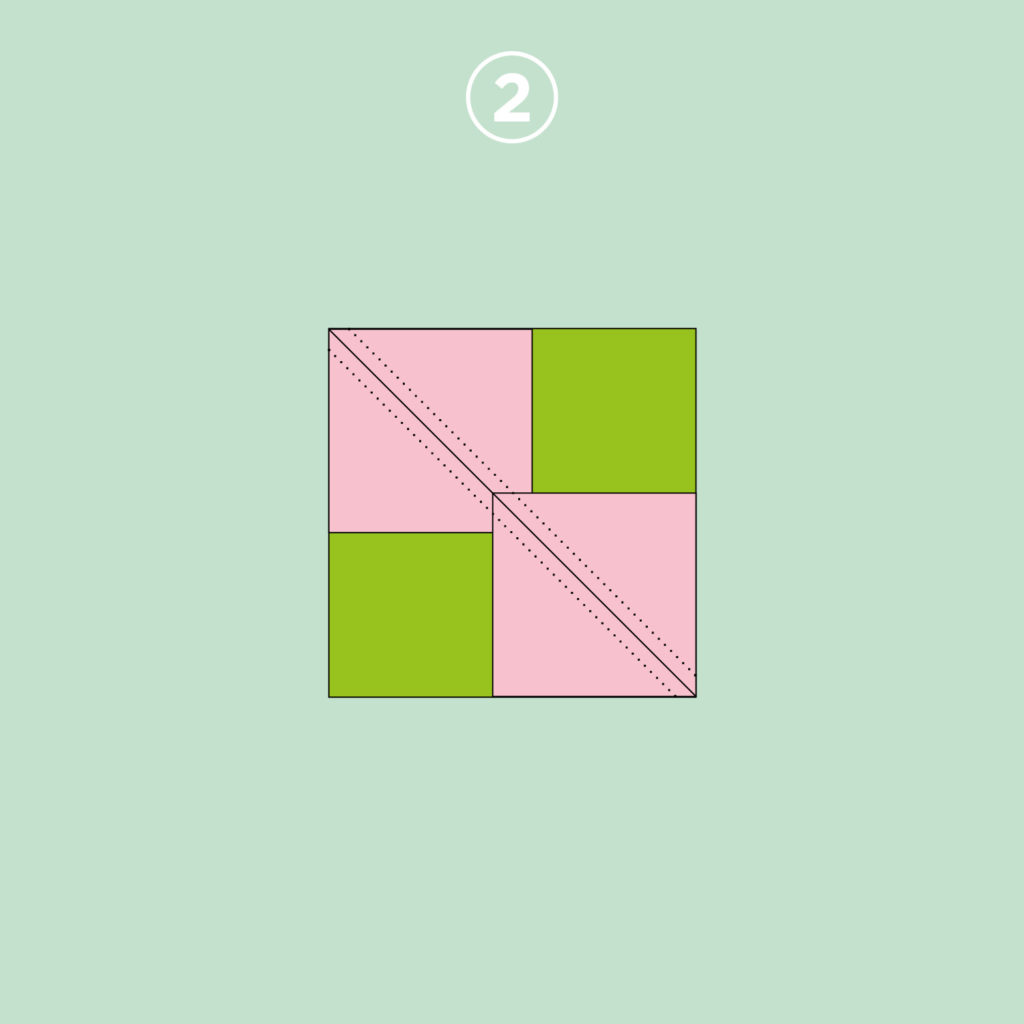
Schritt 2 / Step 2
- Nimm 2 kleine Quadrate und leg diese rechts auf rechts an die gegenüberliegenden Ecken des großen Quadrats.
- Näh 1/4 inch links und rechts der gezeichneten Linie.
- Take 2 small squares and place them right sides together at opposite corners of the large square.
- Sew 1/4 inch left and right of the drawn line.
Schritt 3 / Step 3
Schneide entlang der gezeichneten Linie.
Cut along the drawn line.

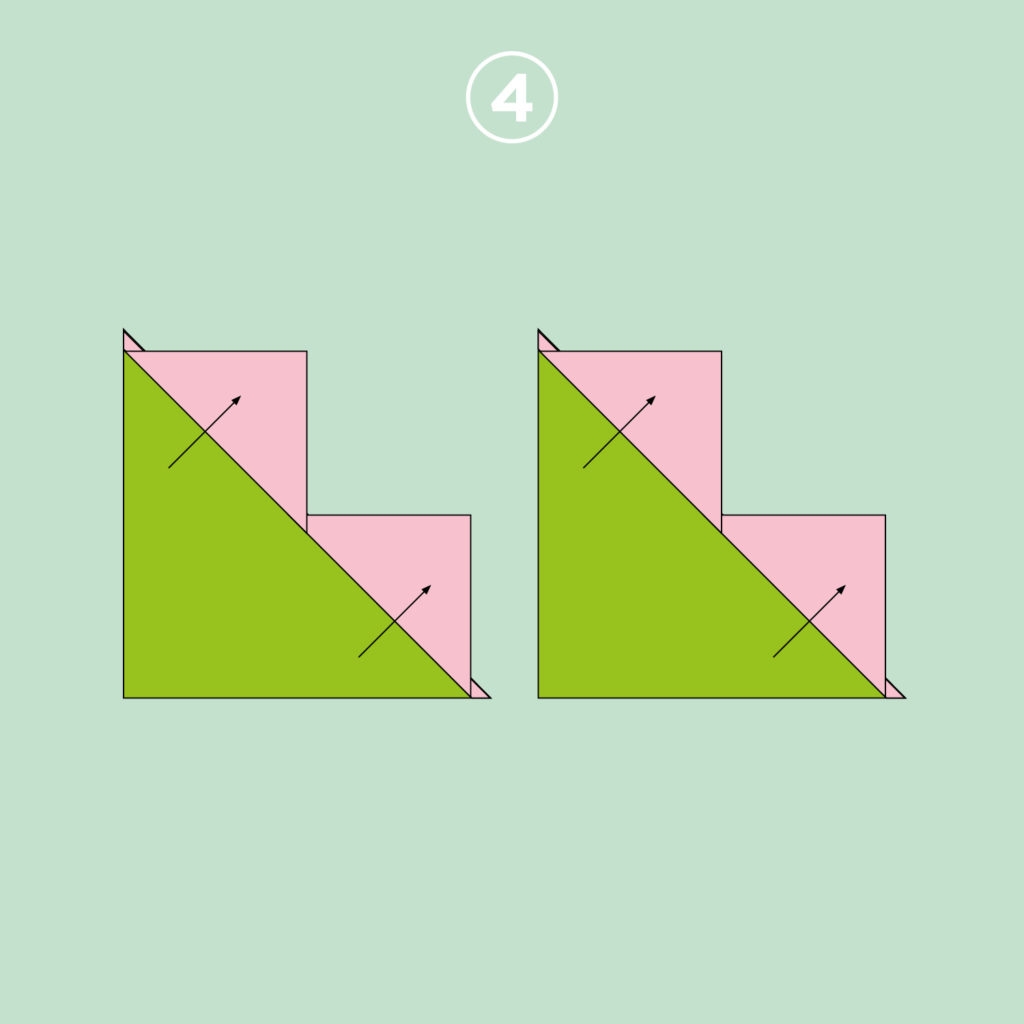
Schritt 4 / Step 4
Bügel die Nahtzugaben in Richtung der Pfeile.
Press seams as arrows show.
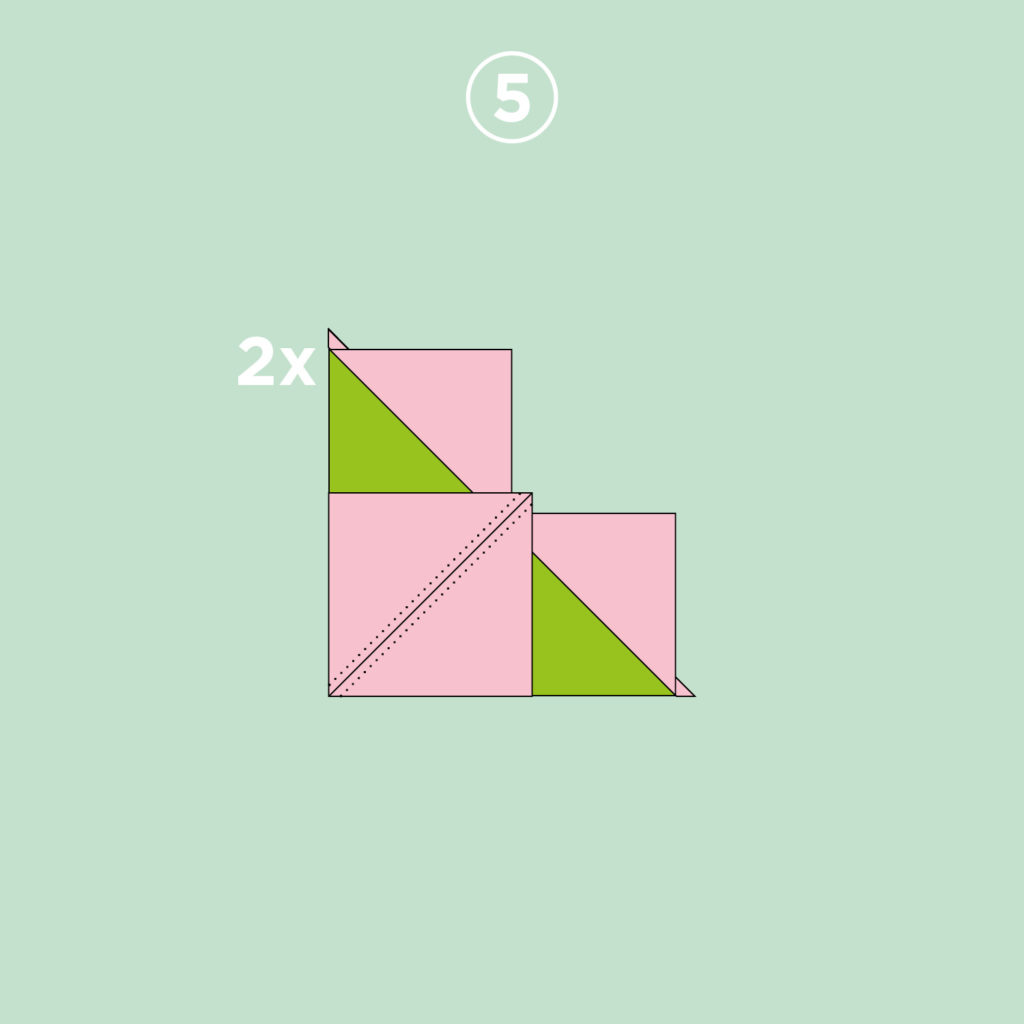
Schritt 5 / Step 5
- Nimm ein weiteres kleines Quadrat und leg es rechts auf rechts an die Ecke des großen Quadrats.
- Näh 1/4 inch links und rechts der gezeichneten Linie.
- Wiederhole Schritt 5 mit dem anderen Teilstück.
- Take another small square and place it right sides together at the corner of the large square.
- Sew 1/4 inch to the left and right of the drawn line.
- Repeat step 5 with the other piece.
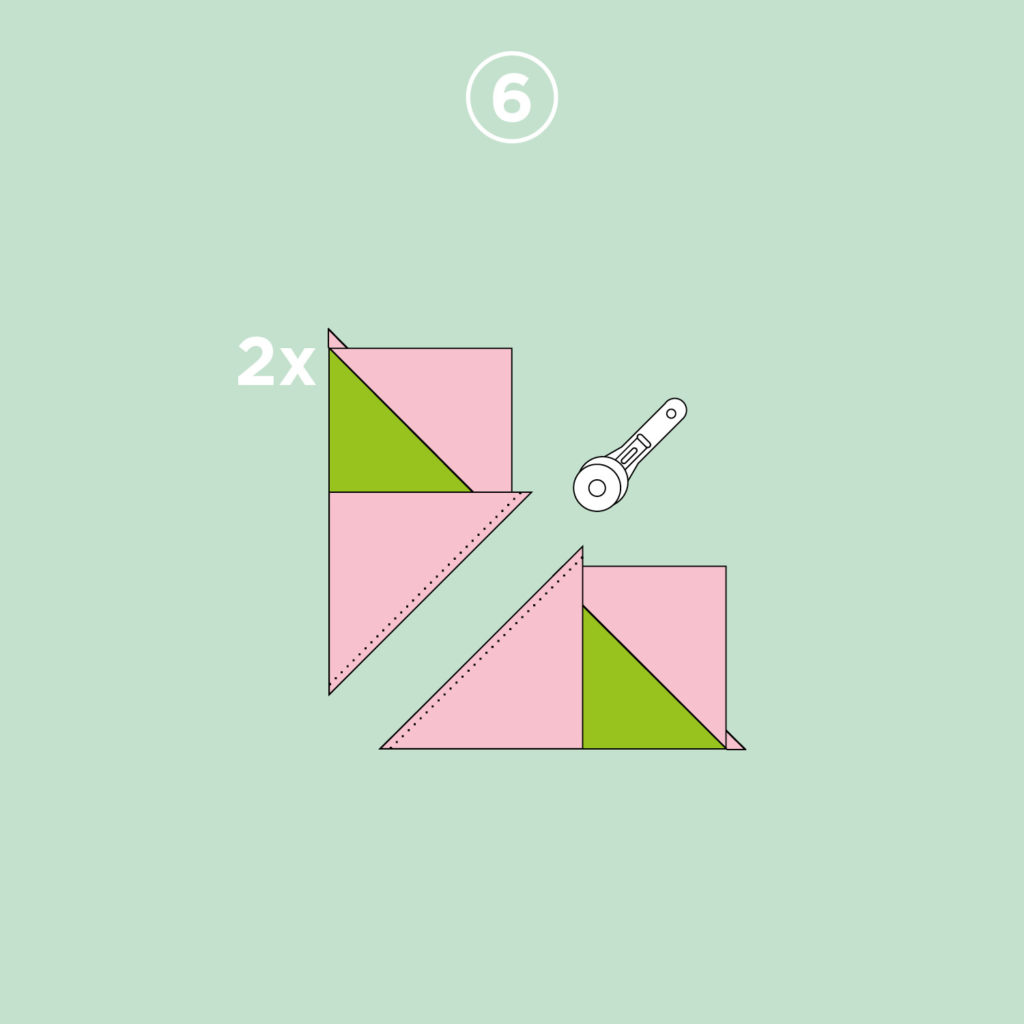
Schritt 6 / Step 6
- Schneide entlang der gezeichneten Linie.
- Wiederhole Schritt 6 mit dem anderen Teilstück.
- Cut along the drawn line.
- Repeat step 6 with the other piece.
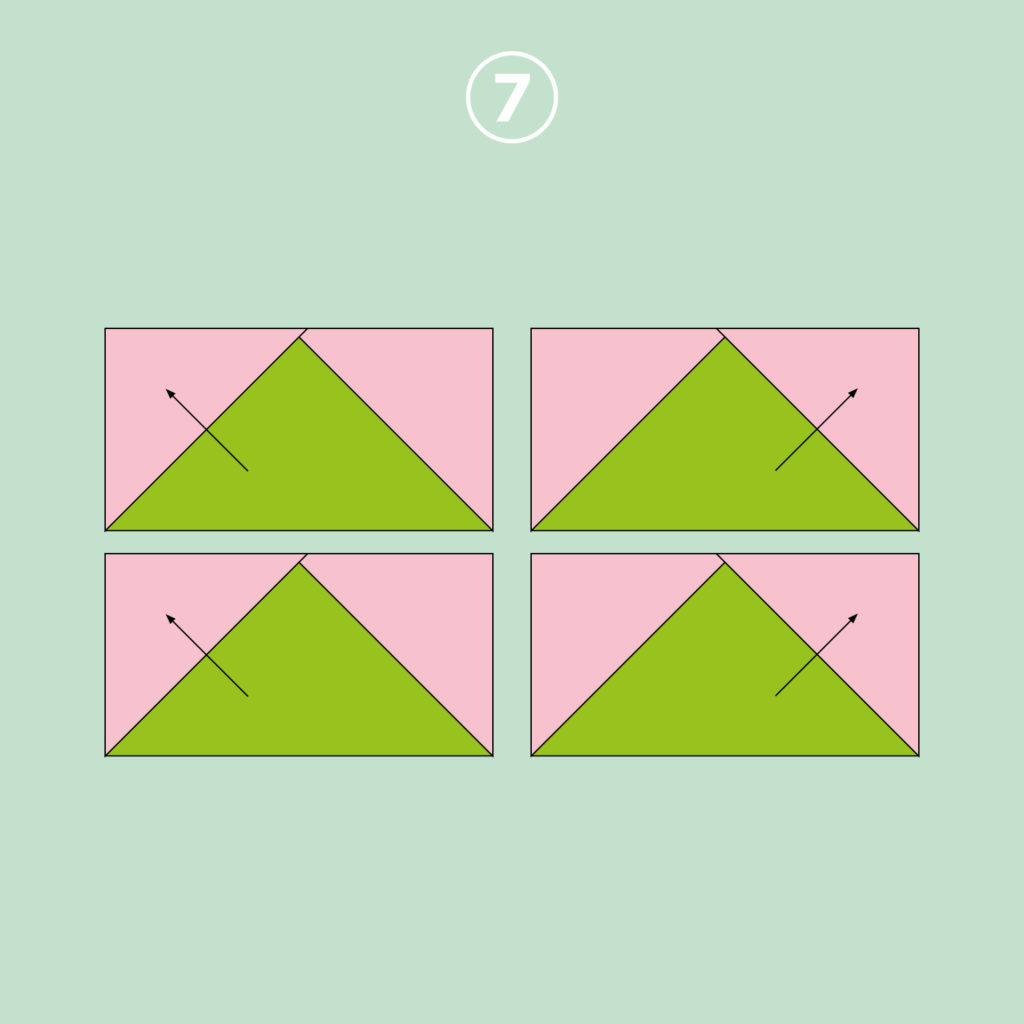
Schritt 7 / Step 7
- Bügel die Nahtzugaben in Richtung der Pfeile.
- Schneide die 4 Flying Geese auf die richtige Größe.
- Press the seams as arrows show.
- Trim the 4 Flying Geese to the correct size.
Flying Geese – 4 at a time chart
So einfach ist die „4 at a time“ Methode zu nähen. Und damit Du es in Zukunft noch einfacher hast, kannst Du Dir mein „Flying Geese – 4 at a time chart“ runterladen.
That’s how easy the „4 at a time“ method is to sew. And to make it even easier for you in the future, you can download my „Flying Geese – 4 at a time chart“.

Weitere Basic Quilt Tutorial Beiträge sind schon in Arbeit.
More Basic Quilt Tutorial posts are already in the works.
Happy Sewing!
Pattern: „Happy Star Quilt“







Leave A Reply